Whether you have a collection of decorative skateboard decks or a backlog that you’re waiting to skate, hanging your skateboards on the wall is an awesome way to showcase your favorite graphics. There are a number of ways to mount your skateboard to the wall, with or without nails, but as someone who’s a renter, opting for no-hole options is pretty much my only option. Since I think we can all agree that the fewer holes in your wall the better, these methods will provide options that don’t require screws or nails where possible.
To start things off, let’s get into some more DIY ways to hang a skateboard both vertically or horizontally. Later on, I’ll share a few cool mounting racks to consider if you are looking for skateboard deck storage more than decorative mounting.
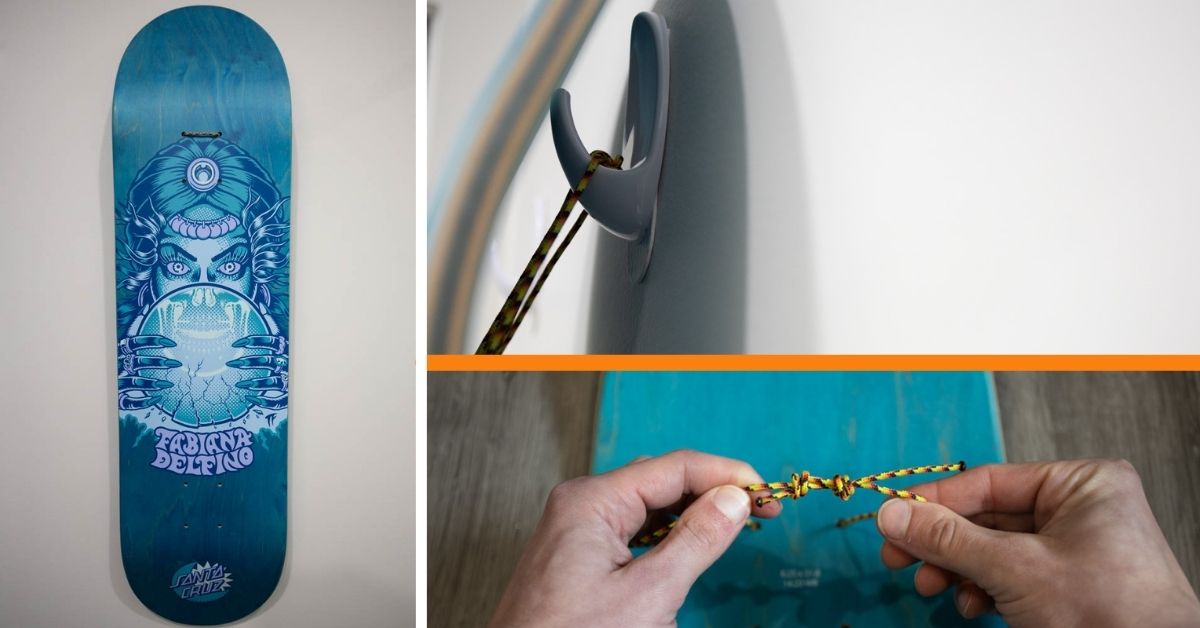
1. Vertical Skateboard Wall Mounting
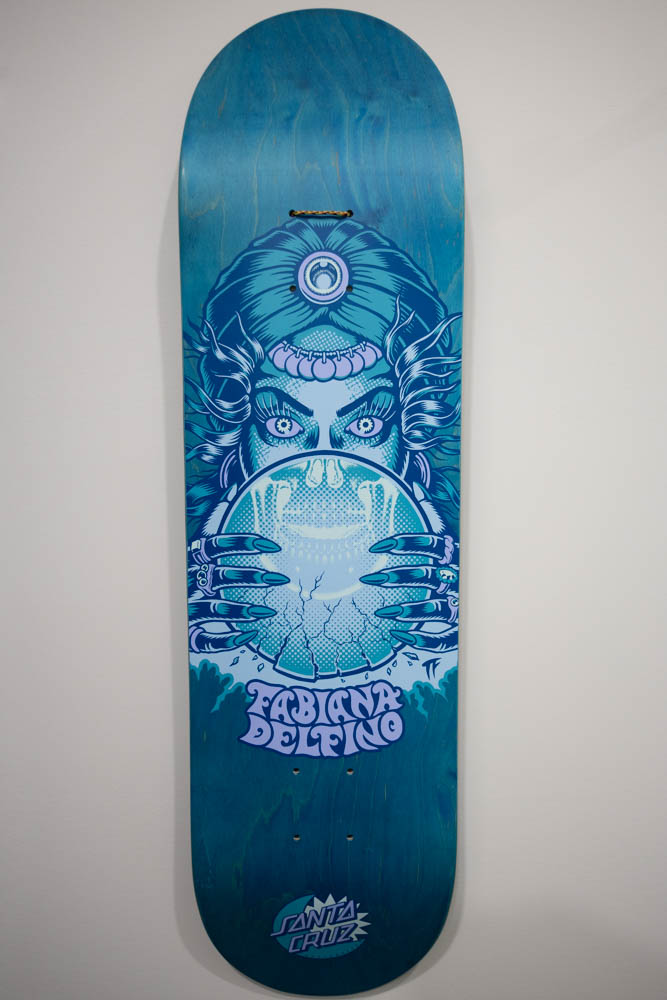
This is the best option if you have a few decks to mount side by side. Since skateboard graphics are often oriented vertically, this mounting position offers the best view of the artwork.
Before you get started, here are the tools and materials you’ll need:
- Scissors or knife
- Fishing Line, or Thin Paracord
- Adhesive Command Hooks
- 15 minutes of your day
The command hooks you choose are up to you. I had some larger ones laying around from another home project, so that’s what I’ll be using in my examples. The main thing to consider is the maximum strength the hooks can hold. Skateboard decks by themselves only weigh a few pounds, so an adhesive hook rated for 5lbs or more will do the job. Larger decks such as cruisers or longboard decks can weigh more than 5lbs, so make sure to double-check the weight of your deck before mounting.
Step 1: Mount Your Command Hook

Command hooks come with adhesive strips that easily stick onto the hook and the wall. Be sure to follow the mounting instructions listed by the adhesive hook you are using. In most cases, you will need to wait 30 – 60 minutes before adding weight to the hook.
Step 2: Cut 8 – 12 Inches Of Fishing Line Or Rope
With the command hook mounted where you want your skateboard to hang, cut 8 to 12 inches of fishing line from the spool, or take the same amount from your paracord or rope. This line will be threaded through the skateboard so the shorter the line, the closer to the hook your deck will mount.
Step 3: Thread The Line Through The Top Bolt Holes In The Deck

Take each end of your line and poke it through the upper bolt holes at the top of your graphic. Make sure to start from the graphic side, pushing the line through to the top side of the deck.
Step 4: Tie The Rope Or Fishing Line Together

With the loose ends pushed through your skateboard, tie them into a knot to create a circled loop. A double fisherman knot is the most solid knot choice to use since it won’t come undone. However, a few basic overhand knots can get the job done too if you’re not knot savvy.


Step 5: Loop The Rope Or Fishing Line Onto The Command Hook

With the line tied together, place the loop over the hook of the command hook and position your skateboard until it’s straight. Now rinse and repeat for the remaining skateboard decks you want to mount!
With this wall mounting solution, it’s best to not have grip tape on your skateboard as it may cause damage to your walls.
2. Horizontal Skateboard Wall Mounting
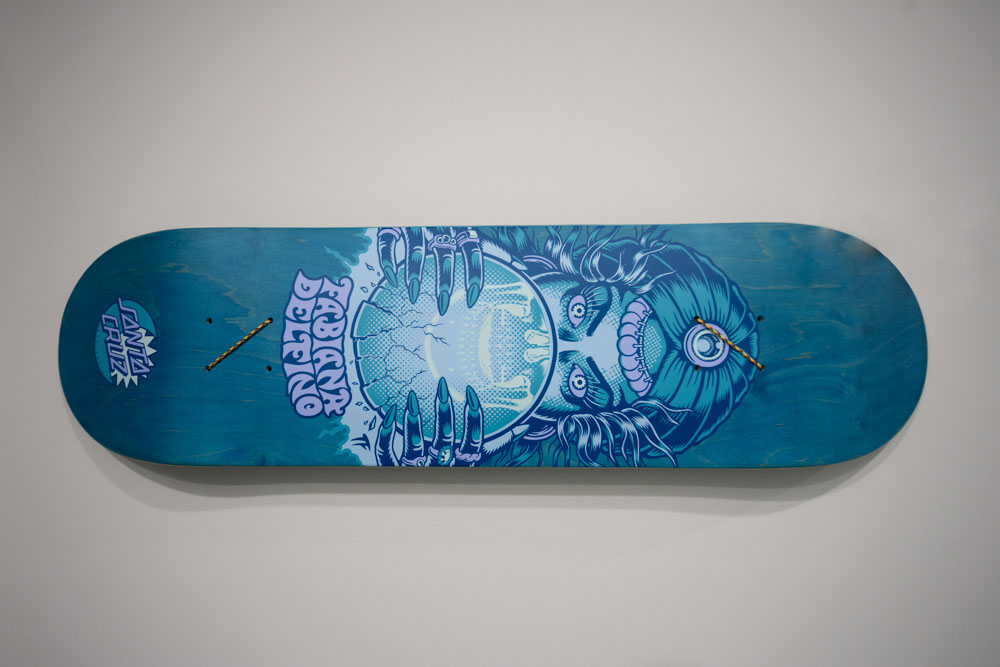
If you have a deck with horizontal graphics, mounting the board to your wall horizontally may be the better way to go. Going from a similar technique as the last mounting option, this method requires some slightly different knot tying to get the job done.
Here’s what you’ll need for this mounting option:
- Scissors Or A Knife
- Fishing line, Thin Paracord, or Rope
- Command Hooks (1 for each skateboard)
- Basic Knot Tying Skills
- 20 Minutes Of Your Day
Once again, be sure you are using command hooks rated for at least 5lbs for standard skateboard decks. For larger-width decks or longboards, check the weight of your deck before buying a command hook. That way nothing comes crashing down after you mount!
Step 1: Mount Your Command Hook
Once again, choose a location for your command hook while keeping in mind the length of your skateboard deck. If you plan to mount multiple boards in a row, or stacked vertically on the wall, be sure to measure the general distance before placing the hooks.
Step 2: Get 2 – 3 Feet Of Fishing Line Or Rope
Since you need enough rope to go the length of your skateboard deck, this time you’ll need a little more length. By having a long piece of cord it’s easier to adjust the height of your skateboard once it’s hung. I am using about 3 feet of paracord in this example.
Step 3: Thread One End Of Line Diagonally Through The Bolt Holes

Starting from the top of the deck, push the rope through to the other side. Now thread it back through the bolt hole diagonal from where you started. Ideally, the second bolt hole you go through is on the bottom side of your deck when it’s in the mounted position.

Step 4: Tie An Overhand On A Bite & Thread The Remaining Line Through
With the end of the rope you just poked through, take a bite of rope and tie an overhand knot to create a loop.


Now take the other end of your rope and thread it through the loop you just created and pull tight. Now, this side of the board is secured.


Step 5: Repeat Thread Pattern On Other Side
Taking the end of your rope to the other side of your deck, poke it through the closest bolt hole, then thread diagonally to the bottom bolt hole as shown below.


Step 6: Tie A Double Fisherman Around The Center Rope
With the remaining end of your rope, pull it through until you have the desired length for hanging. Once you’re happy, tie a double fisherman around the rope that’s stretching between the two ends of the board.


A double fisherman can slide up or down after it’s tied so it’s easy to adjust the length of the line once you’re done. Meanwhile, the friction of the rope going diagonally through the bolt holes is enough to prevent the rope from slipping.

Step 7: Mount Your Skateboard To The Wall

Now loop the center of the rope over the command hook on the wall. If the rope is too long you may see the command hook above your board. In that case, simply slide the double fisherman knot up the rope to shorten the rope and keep the skateboard snug to the hook.
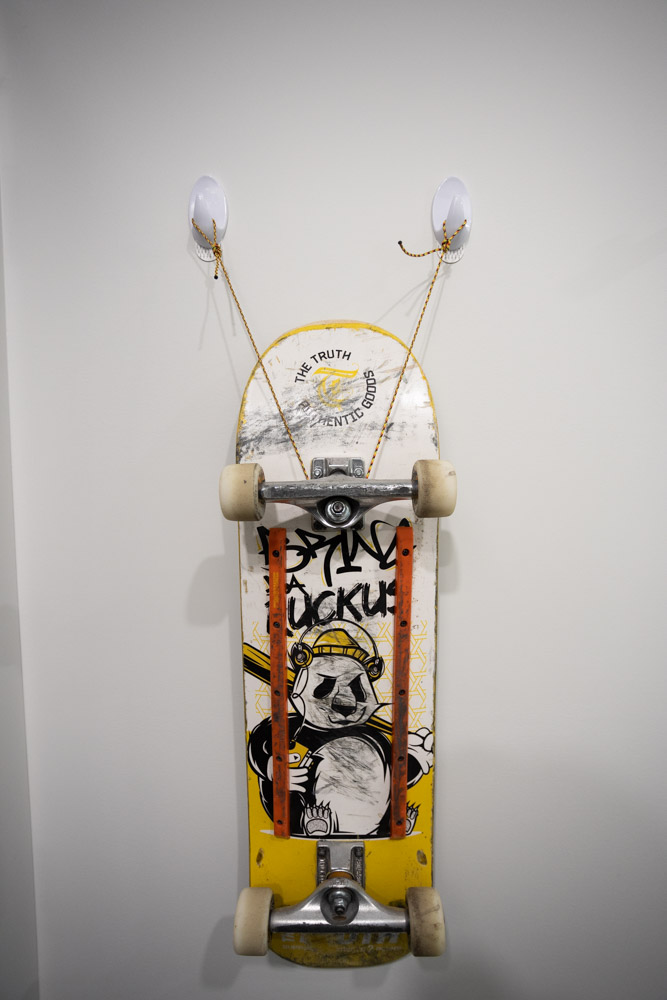
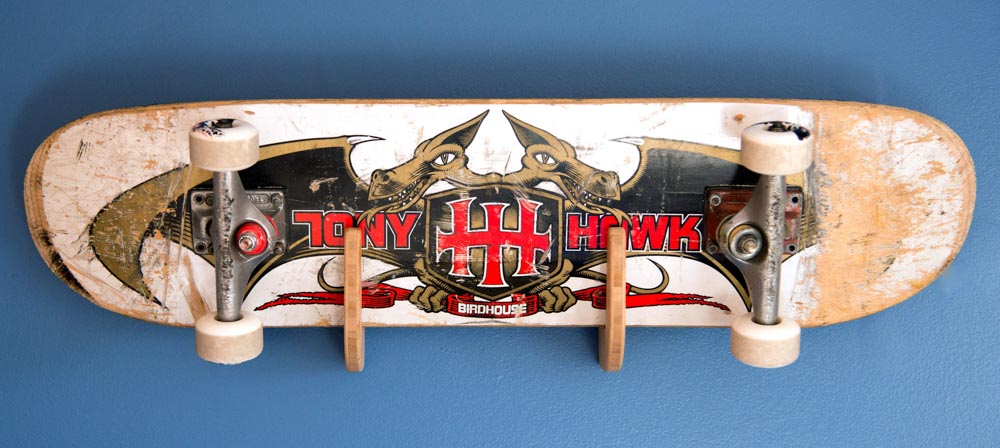
3. Mounting A Skateboard Deck With Wheels To A Wall
If you aren’t going for as much of a decorative look, but more so want a place to hang your skateboards when you aren’t using them, you can use a piece of rope slung on a wall to easily mount a complete deck. Although this method certainly isn’t as aesthetic, it gets the job done and is an easy DIY mounting solution when you have trucks on your skateboard.
Here’s what you’ll need for mounting a complete deck:
- Scissors Or A Knife
- Paracord or Rope
- Command Hooks Rated For 10lbs+
- Basic Knot Tying Skills
- 15 Minutes Of Your Day
Step 1: Tie An Overhand On A Bite On Either End Of Your Rope
First, choose a length of rope suited for the mounting area. If you are planning to only mount one skateboard, 3 feet or rope will be plenty. Once your rope is cut to size, tie an overhand on a bite on either end of your rope.


Step 2: Place Your Command Hooks At The Same Length As Your Rope
Considering the length of your rope, place the command hooks far enough apart so your rope is nearly taught, but still has a slight bend in it. If you are short of wall space, you can keep the hooks closer together but there will be more sag in the rope, like in my example.
Step 3: Loop Each End Of The Rope Over The Command Hooks

Loop the knots you tied in step one onto the command hooks to stretch the rope between the two hooks.
Step 4: Place The Rope Under Your Trucks To Mount The Skateboard
Take your built skateboard with the wheels facing you, place it behind the rope, then place the rope underneath the trucks and wheels. The rope will cradle your skateboard and keep it secure against the wall.
This method is a pretty DIY solution but gets the job done. If you want a more visually pleasing way to mount your skateboards, with or without trucks and wheels, this next section is for you.
4. Using Store-Bought Skateboard Wall Hangers
If DIY isn’t your jam, there are a few solid hangers out there designed specifically for skateboard decks.

The first option to look at is the skateboard mounting rack from Grass Racks. This rack can mount one or multiple skateboards vertically in a similar style to what you see in your local skate shops. The beauty of these racks is they can be used to mount regular skateboard decks, or complete skateboards. Just keep in mind that you’ll need to drill into the wall to mount this shelving unit securely.
For mounting skateboard decks without trucks and wheels, you’ll need the Lana’i Series mount. However, if you are mounting a skateboard with trucks and wheels, you need to use the Moloka’i Series.

Another option to go with for hanging skateboards with wheels is a simple wall hook that you can find on Amazon. These hooks loop under your wheels and are a quick and low-profile way to mount a complete skateboard to your wall. The only downside, once again, is that you’ll need to drill a hole to mount these hooks properly.
So whether you want a DIY way to mount your skateboard to the wall, or a more serious wall mounting unit from Grass Racks or Amazon, there are tons of ways to mount your board for any aesthetic!
Happy Hanging!
Brendan 🙂


