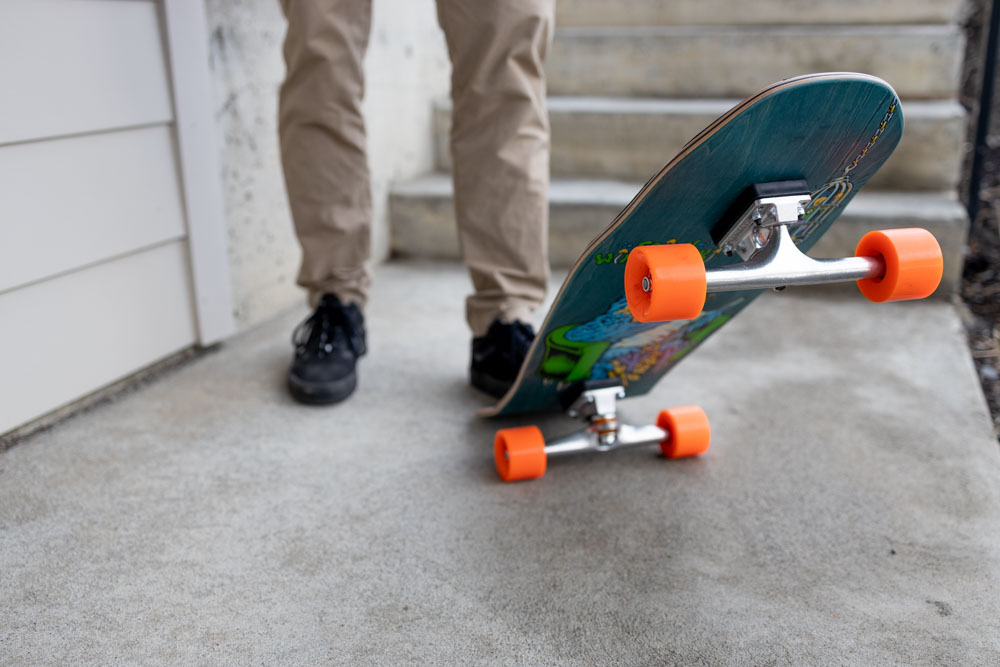
I remember when I first learned how to apply grip tape to a skateboard I felt a bit stressed out that I would mess it up, get air bubbles, or make it look completely janked. Although the first few times I gripped a skateboard all those years ago certainly wasn’t my best work, I now have a different grip technique that’s easy to do, even if this is your first time applying grip tape.
So whether you’re looking to apply grip tape to a new skateboard deck, make custom grip tape designs, or replace the grip tape on your old deck, we’re going to break it all down here.
How To Apply Grip Tape To A Skateboard – Step By Step
To start things off, let’s break down the easy steps to apply grip tape to a fresh skateboard. I’ll be gripping my 10.5″ cruiser deck in this example using Mob Grip Tape. I love Mob because it’s perforated and makes air bubbles easy to avoid; however, there are a handful of other grip tapes I recommend here in my guide to the best grip tapes.
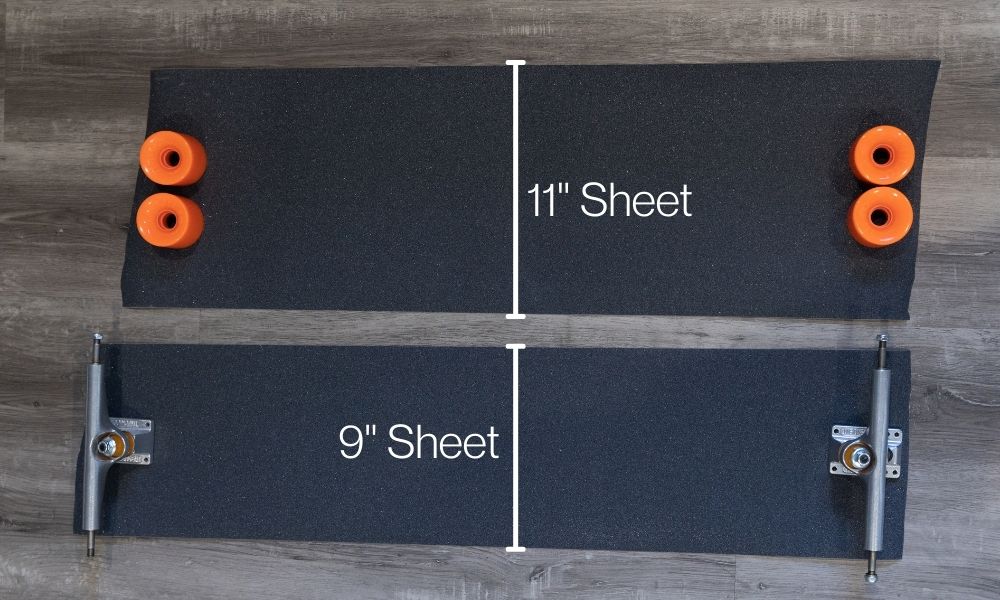
Regardless of the size or the width of your deck, the gripping process will be the same. Just remember to get an 11×33″ sheet of grip if you have a skateboard wider than 9″ in width.
The standard size of grip tape is 9×33″, which is great for most standard-sized decks, but will be small for wider cruiser-style skateboards.
Now before you start, here’s what you’ll need:
- A sharp blade such as a box cutter or razor blade
- 1 sheet of grip tape suited for your deck width
- A metal object such as a screwdriver or a file
- 5-10 minutes of your day
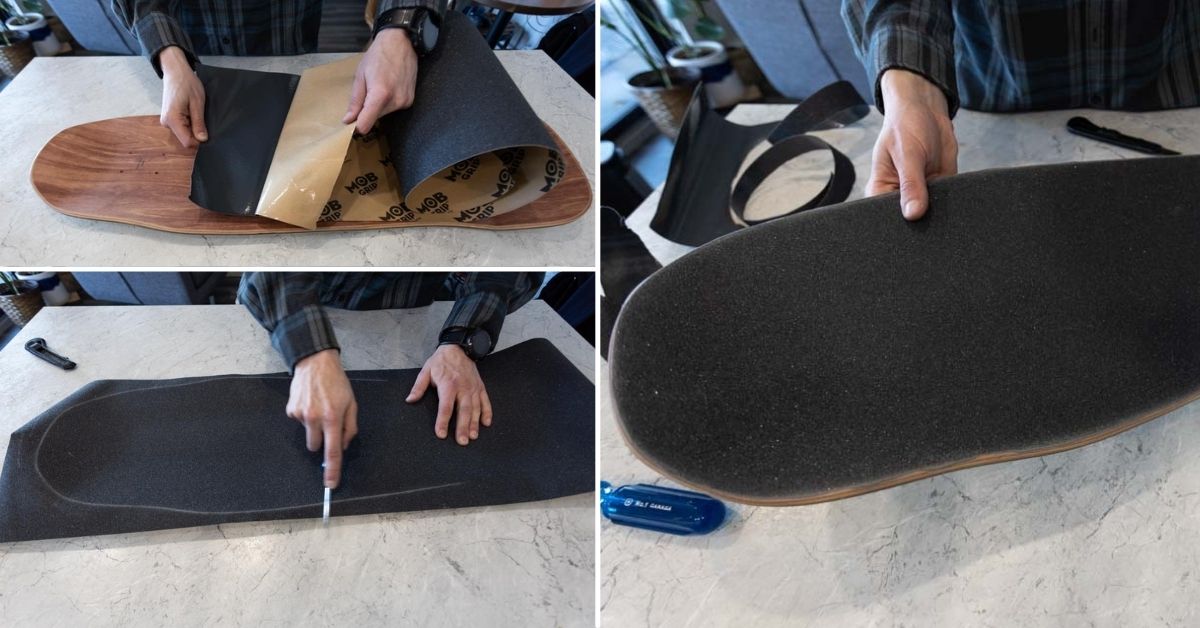
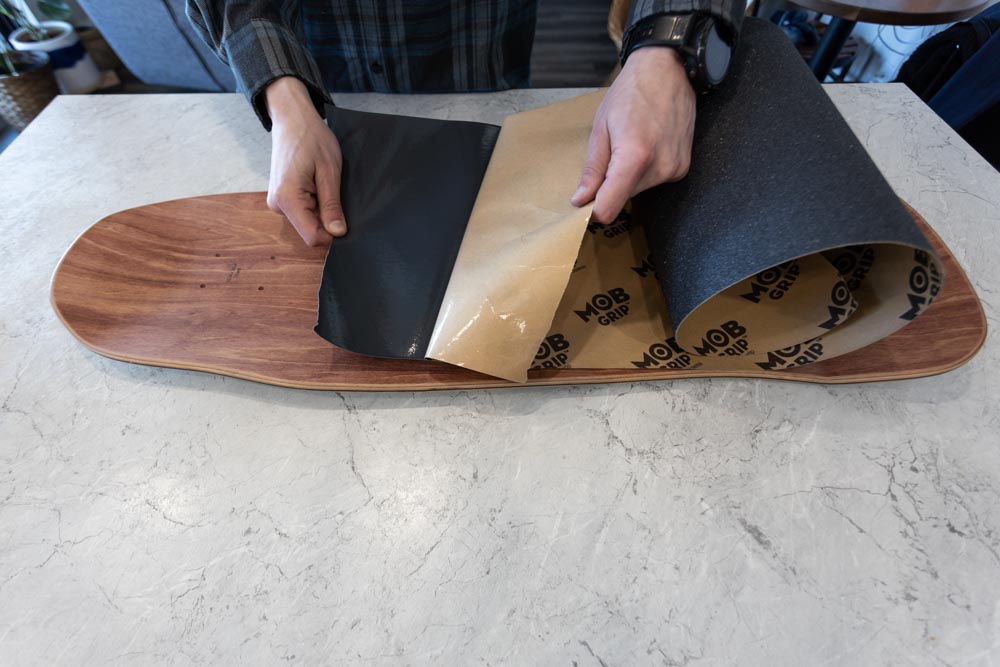
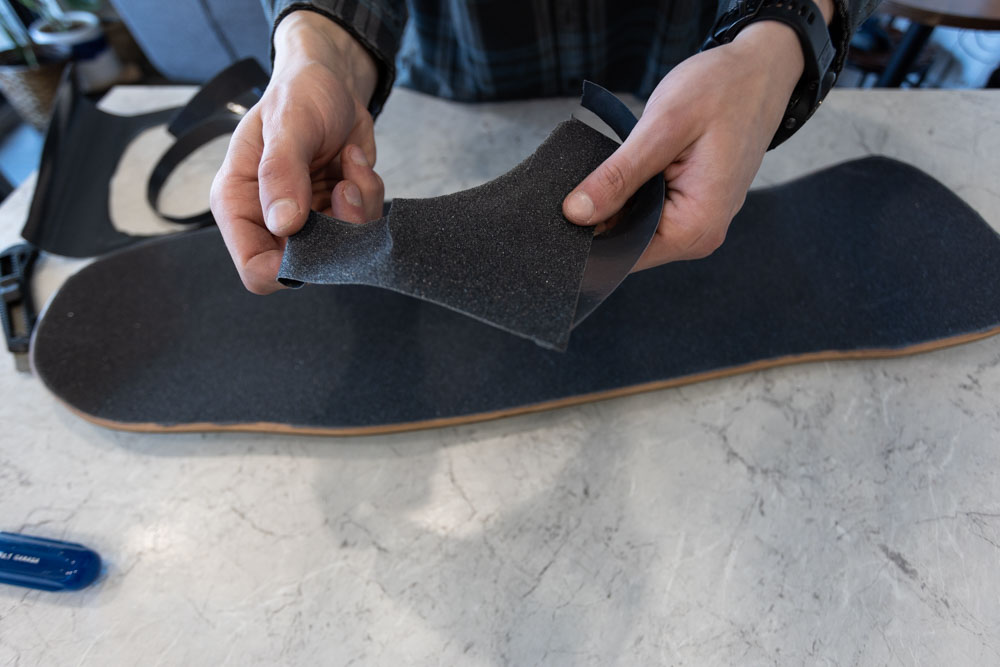
Step 1: Peel The Backing Off The Grip Tape
Just like you would with a sticker, peel the backing off of the grip tape sheet and put it to the side. You’ll be using this paper backing in later steps. Since grip tape is extremely tacky, pinch near the edges of the grip tape to avoid it sticking to itself or onto you.
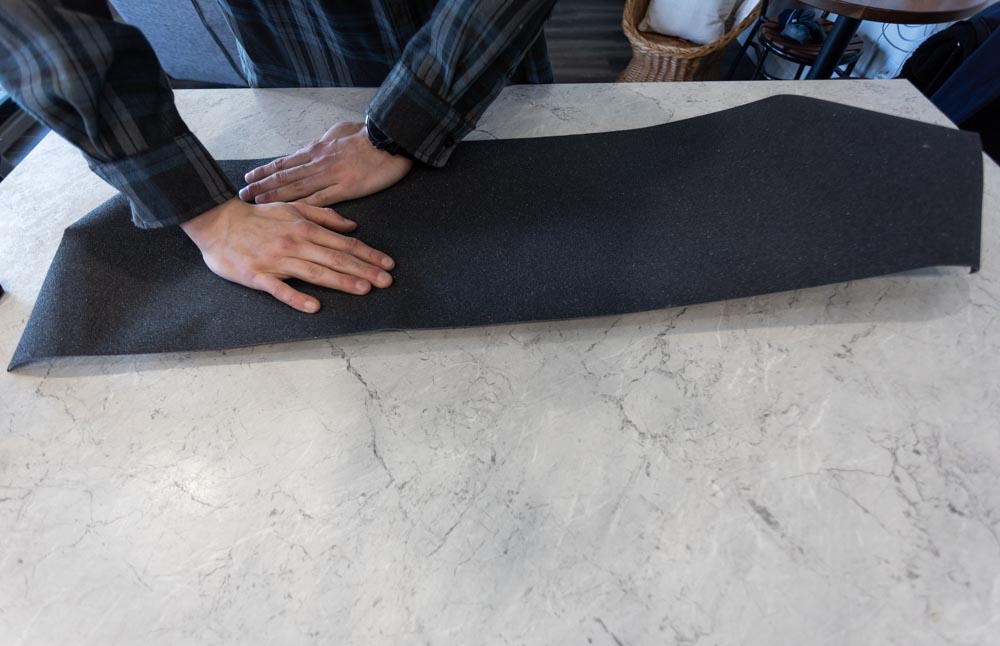
Step 2: Place The Grip Tape On The Nose & Tail Of The Deck
Holding either end of the grip tape and ensuring it is taught, place the grip tape so it sticks onto the tip of the nose and tail.
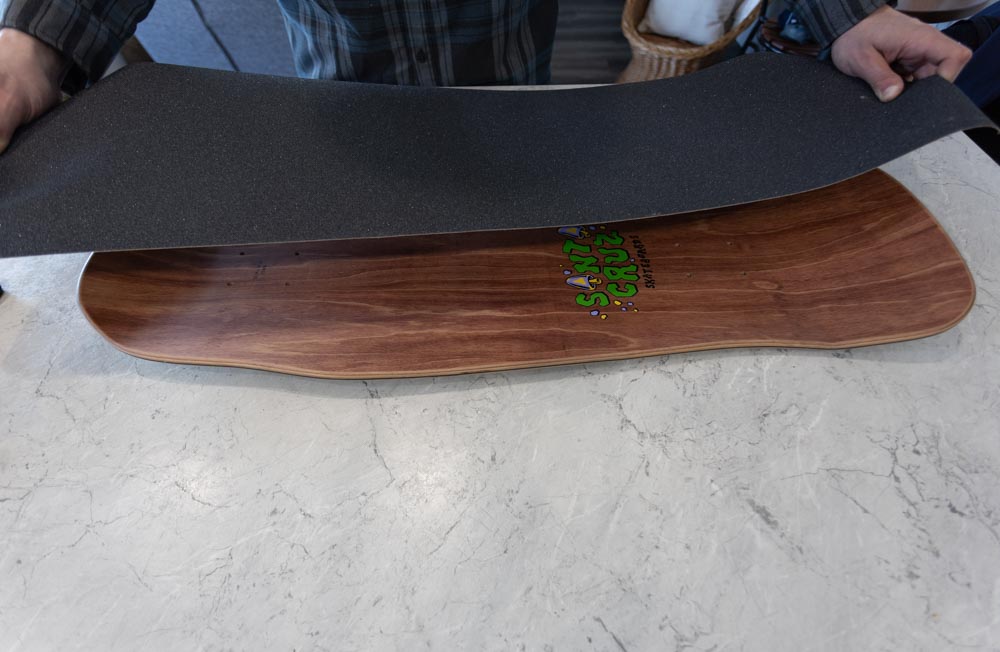
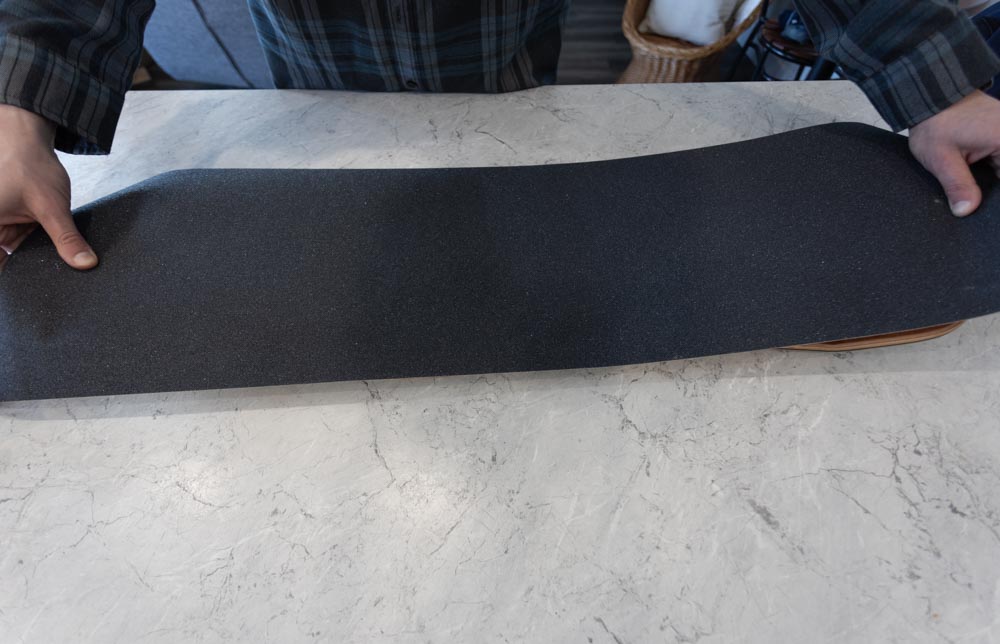
If you are using grip tape with a graphic, make sure to double-check the orientation of the graphic in relation to the nose and tail before applying. Once the grip tape’s on your board, it’s pretty hard to peel up and readjust.
To help with the alignment, lean directly overtop of your board so you can see that the grip tape is covering both sides of the deck.
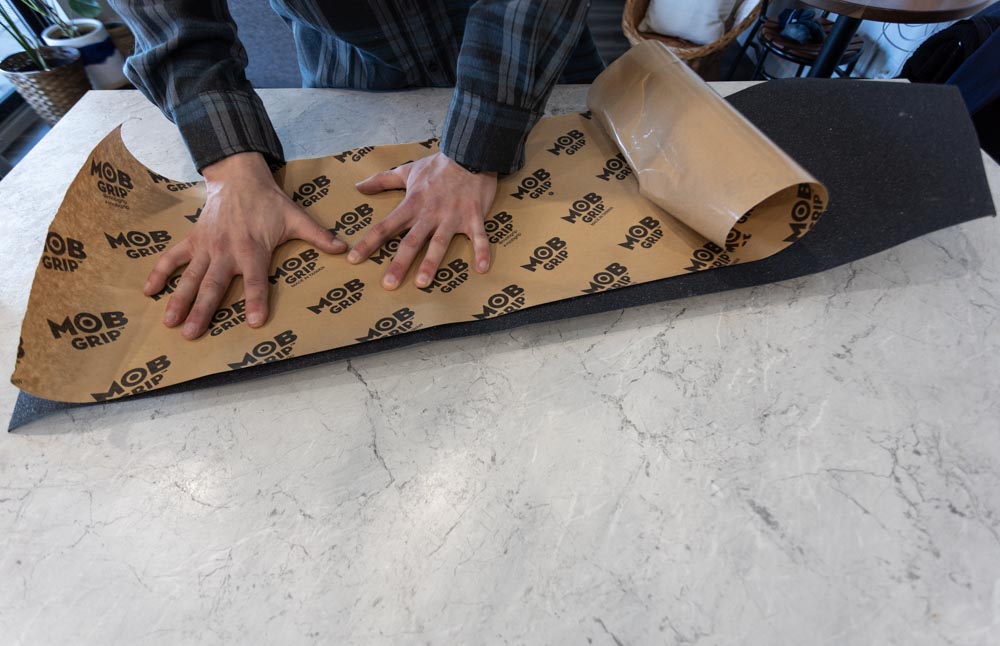
Step 3: Press Down With Your Hands Across The Grip Tape
Taking the grip tape backing you peeled off, place it over your grip tape to protect your hands.
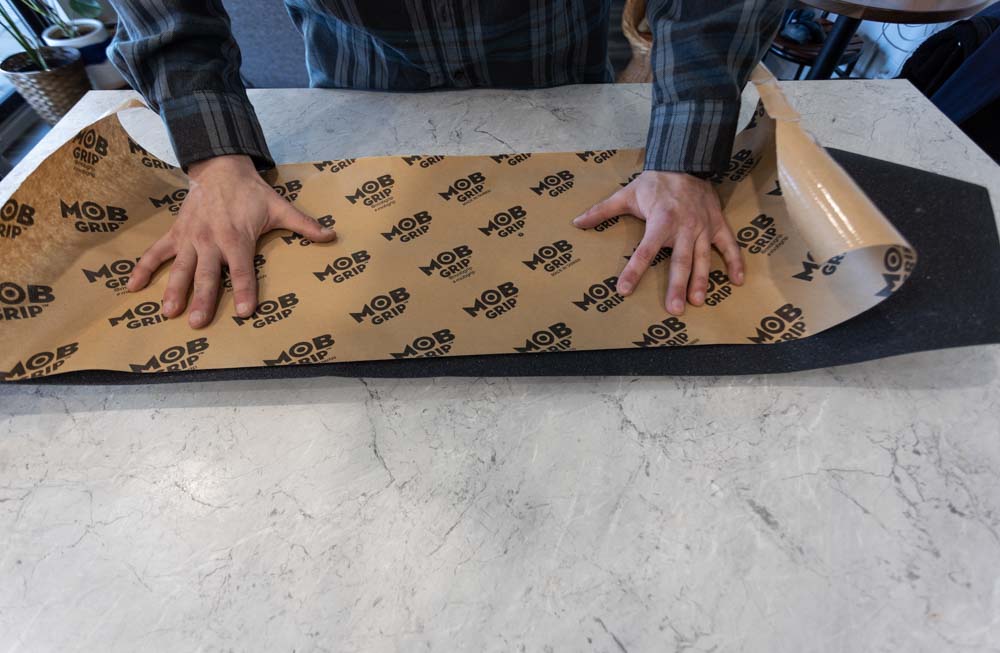
Now press and rub your hands along the nose, center, and tail of the board to stick the rest of the grip tape to the deck.
Step 4: Press Outward Along The Edges To Remove Air Bubbles
In some cases, there will be air bubbles left over after the first round of pressing down your grip tape. To help remove any leftover bubbles, place your hand near the edge of your board and roll your weight from the inside to the outside of your hand. This will force out any air bubbles to the edge of your board and completely remove them.
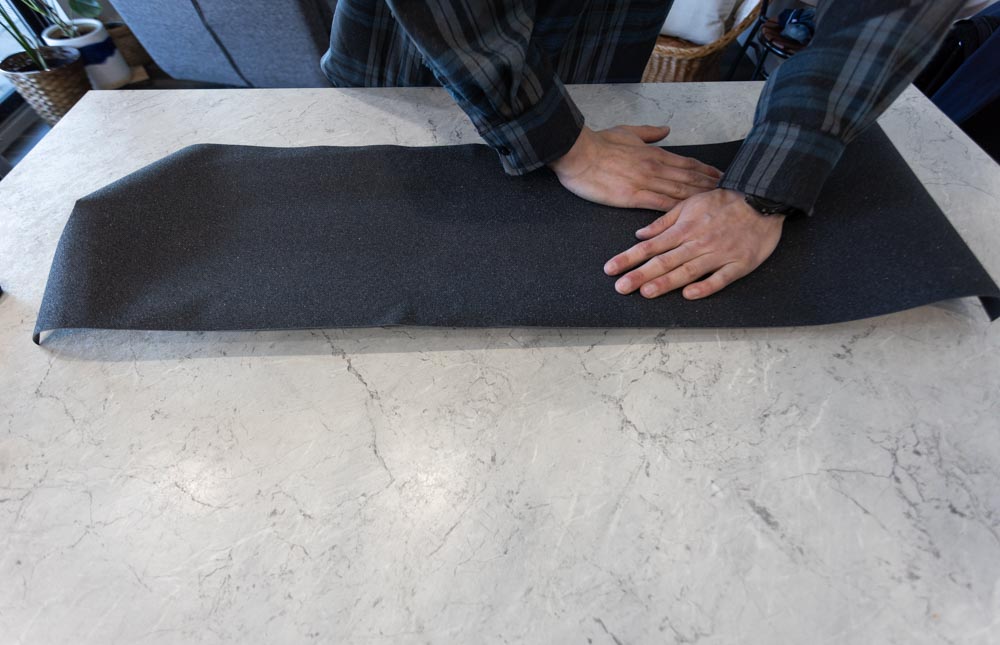
Be sure not to drag your hand across the grip for this step since you’ll shred up your skin pretty fast. Just pressing and rolling your hand will get the job done.
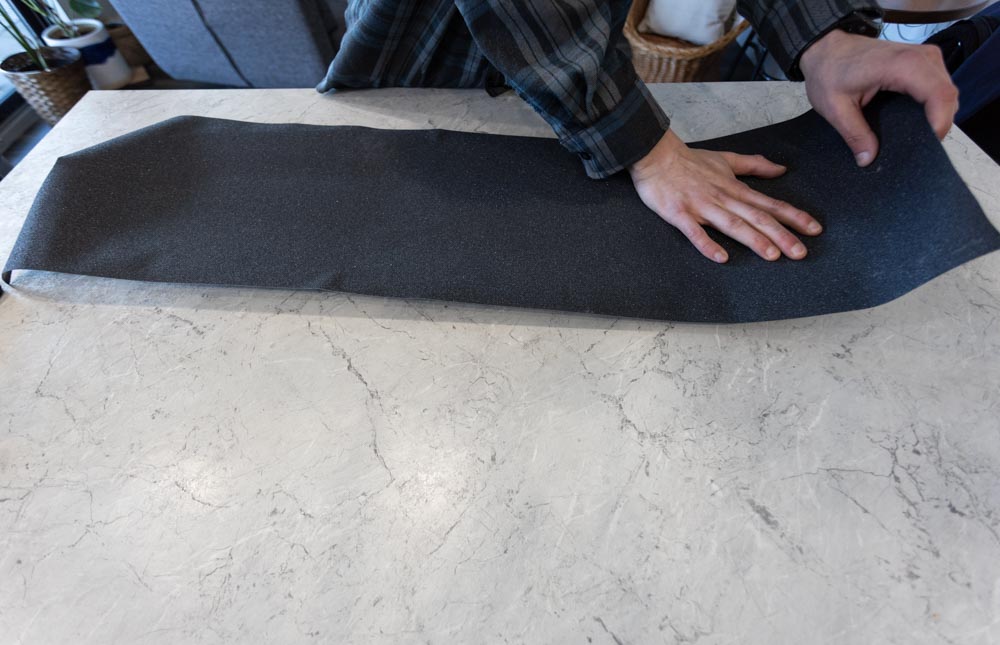
If the air bubbles still aren’t coming out after this step, poke the bubbles with a knife. This will create a hole for the air to escape so you can press down and remove the bubble easily.
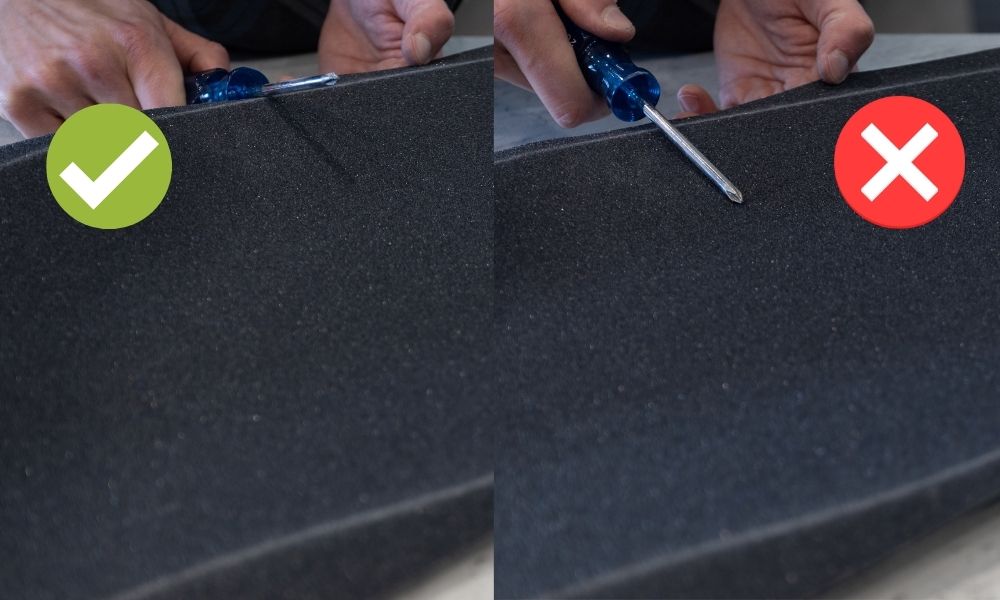
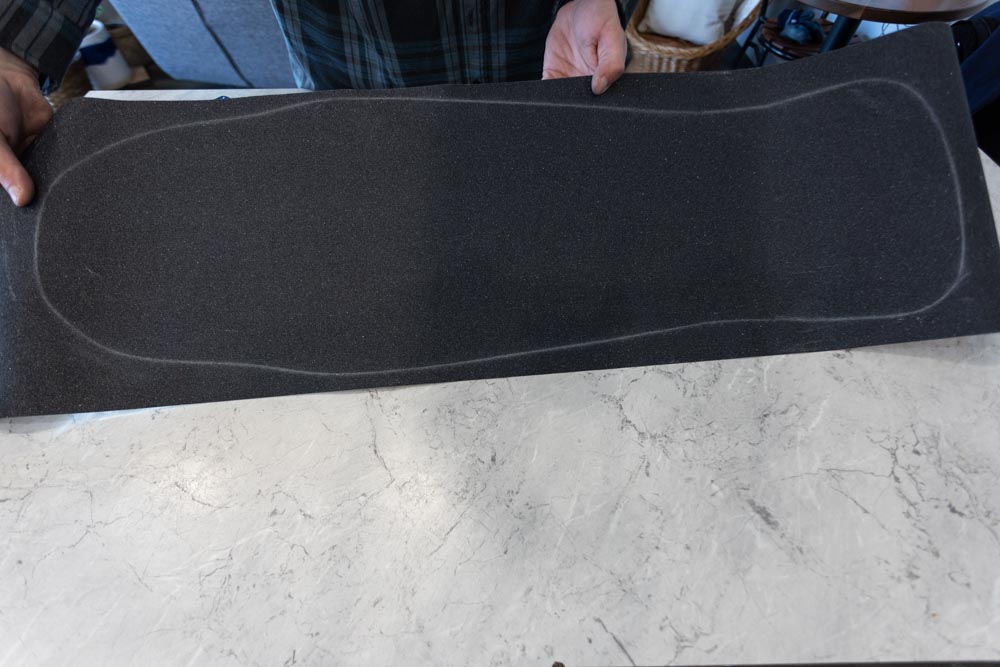
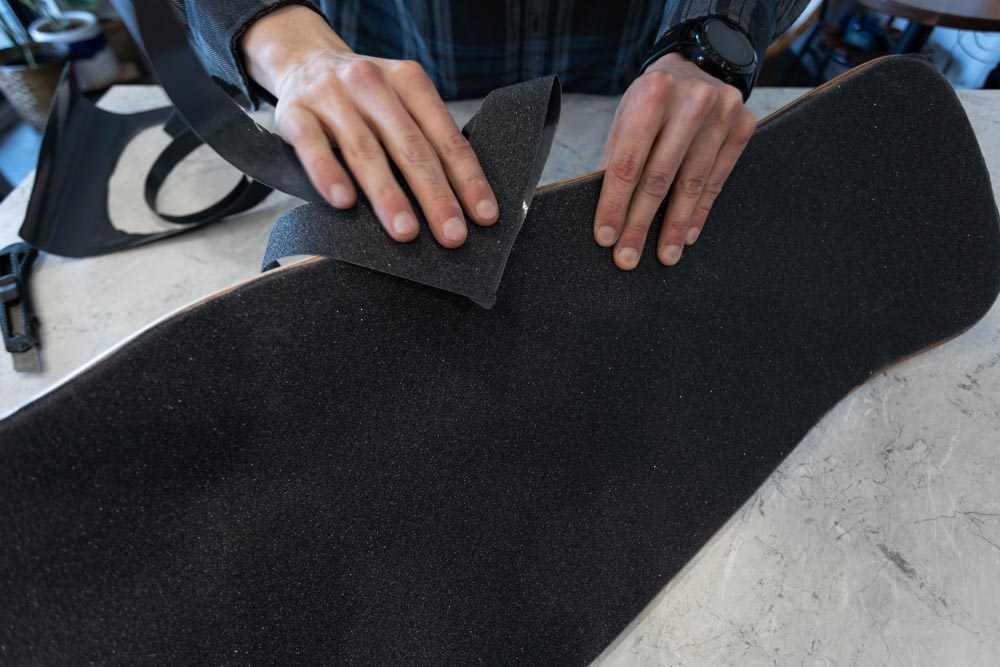
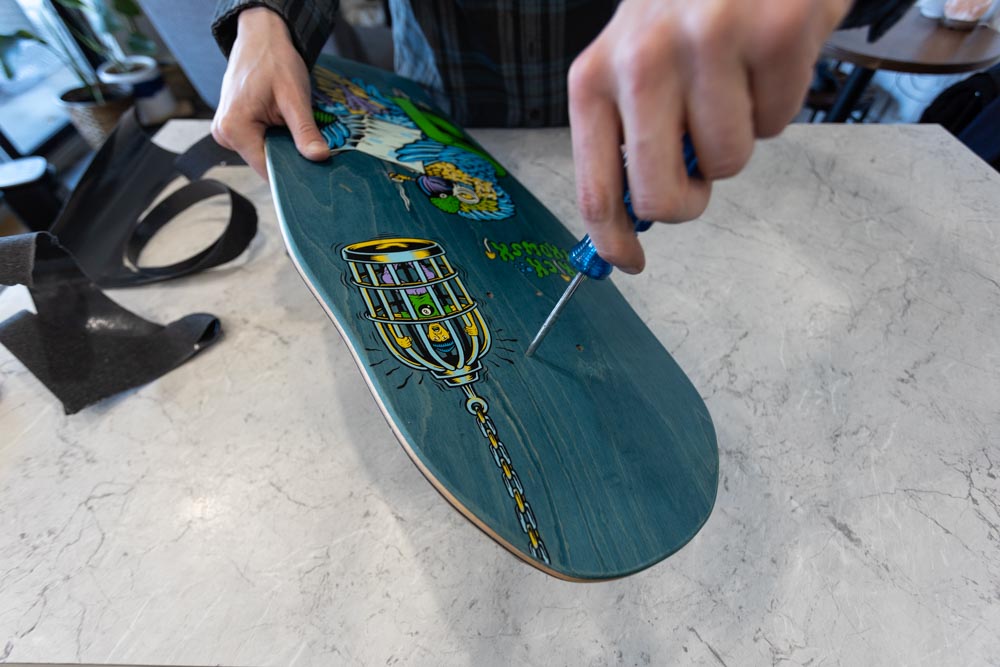
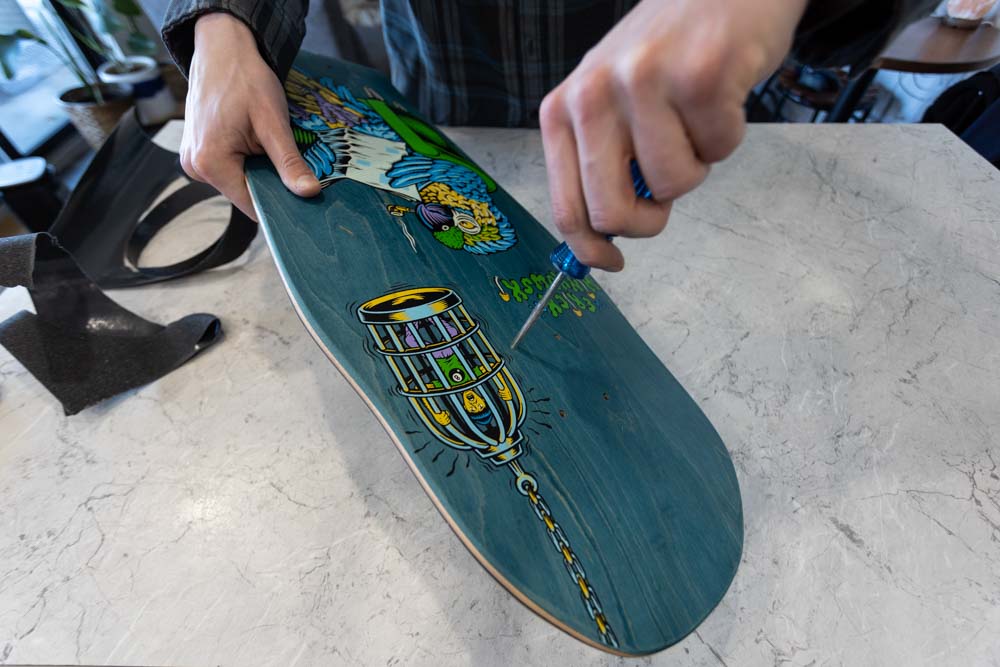
Step 5: File The Edges Of Your Skateboard To Outline The Grip
Using a metal object or a file (I’m using a screwdriver), drag around the outline of your grip tape to create a white line. This line will be used as a reference when trimming the grip tape.
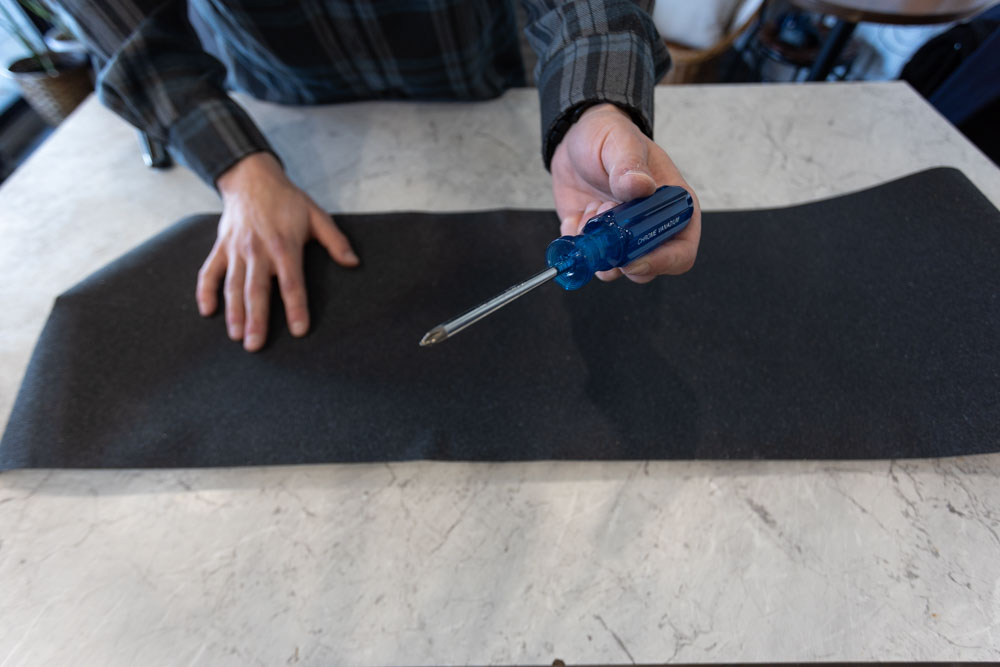
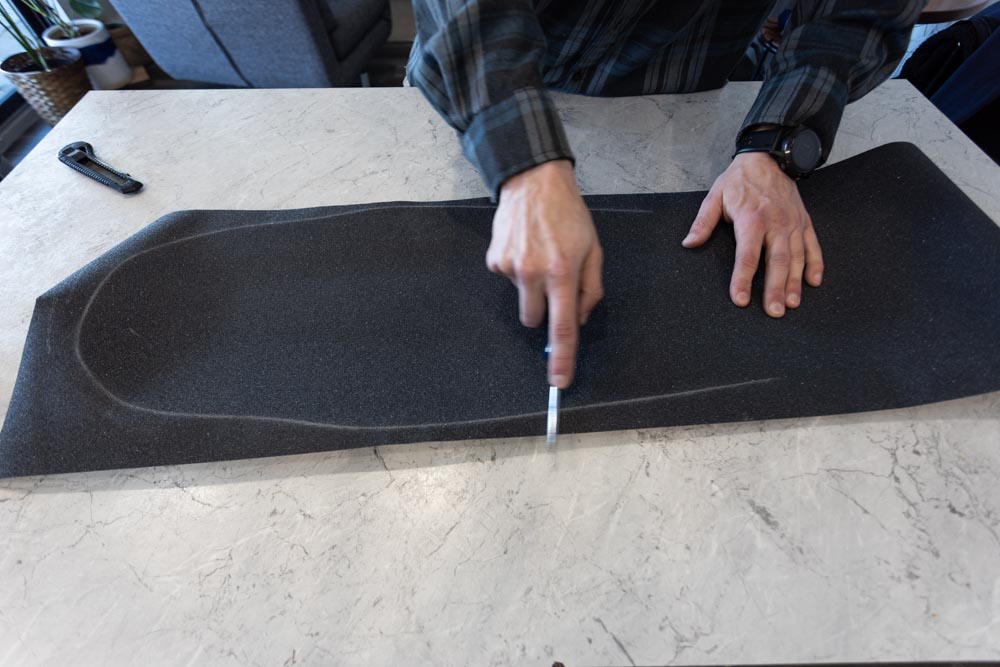
Be sure you aren’t damaging the grip tape you’ll be skating on by angling your screwdriver or file upwards from the edge at a 45° angle. If you are dragging at an angle flush with the deck’s surface, you may cause the grip tape to tear or scuff in areas where you want it to look fresh.
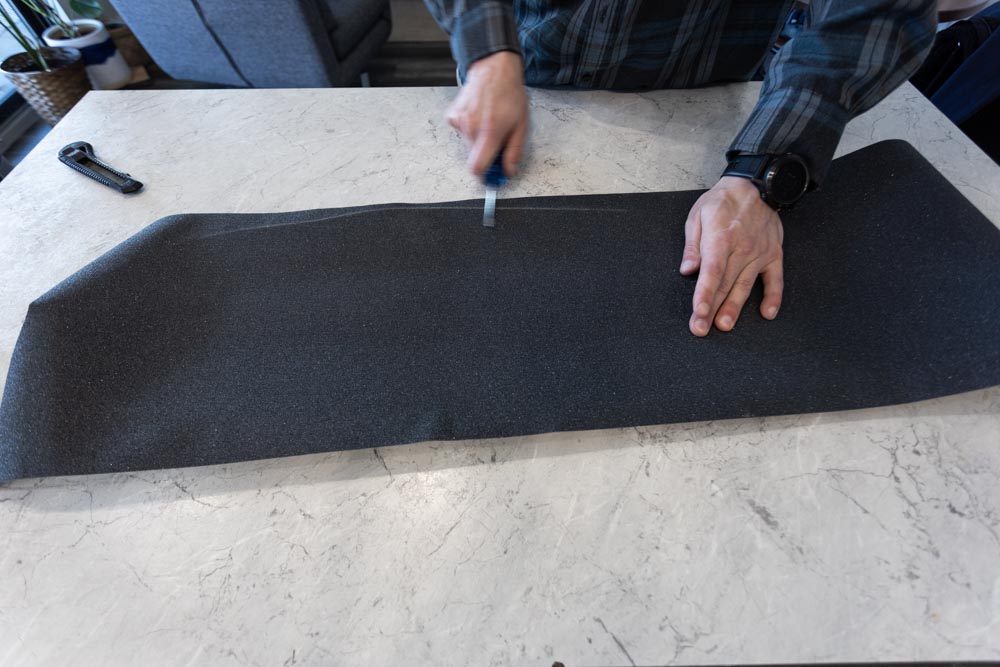
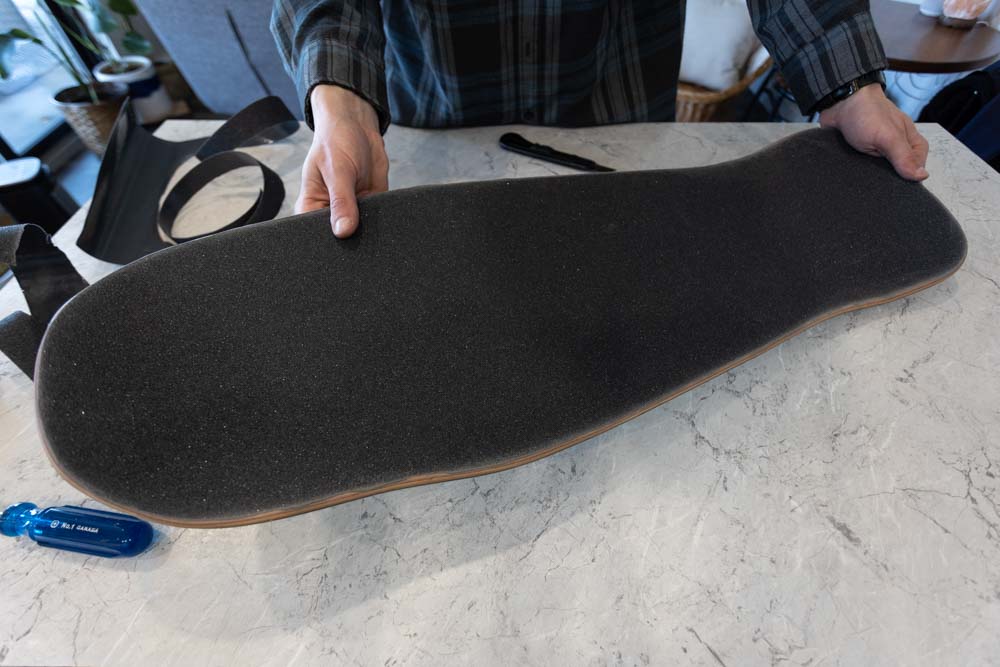
Step 6: Trim Off The Excess Grip Tape With A Knife
Using a sharp blade such as a box cutter or razor blade, place the knife against the edge of your deck beneath the grip tape and press upwards to pierce the grip. Now drag your blade along the white outline you just created, with the blade staying flush against the edge of the deck to create a straight cut.
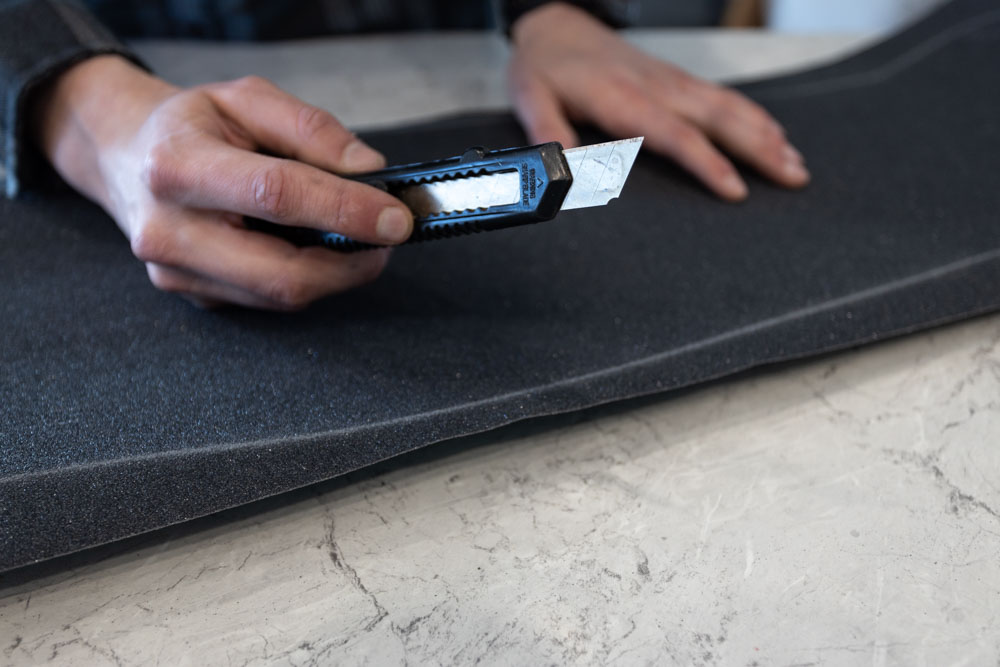
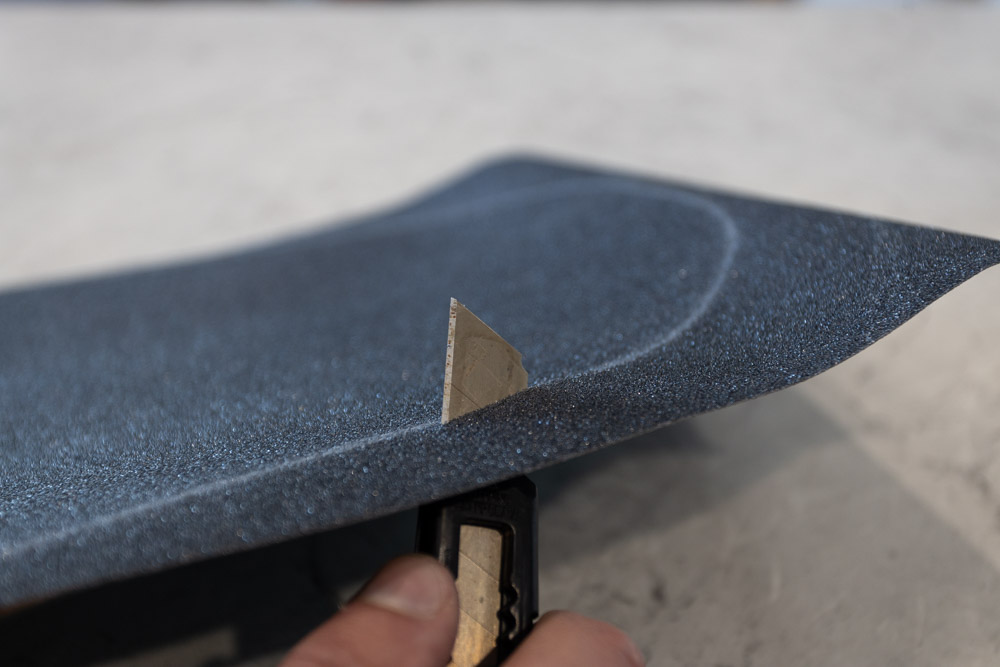
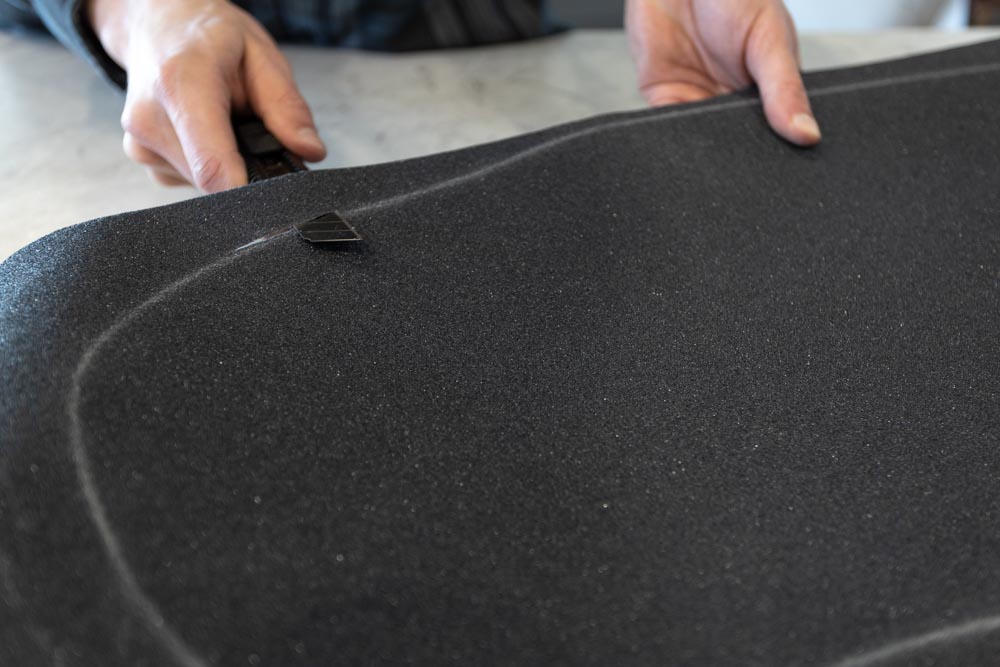
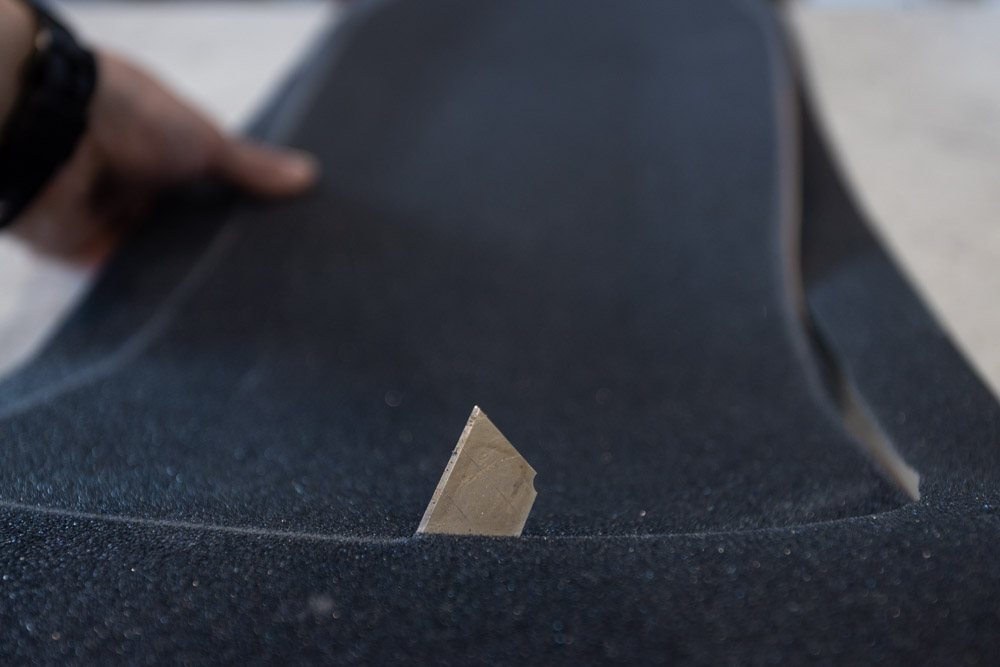
Continue all the way around the skateboard until all of the excess grip tape is trimmed.
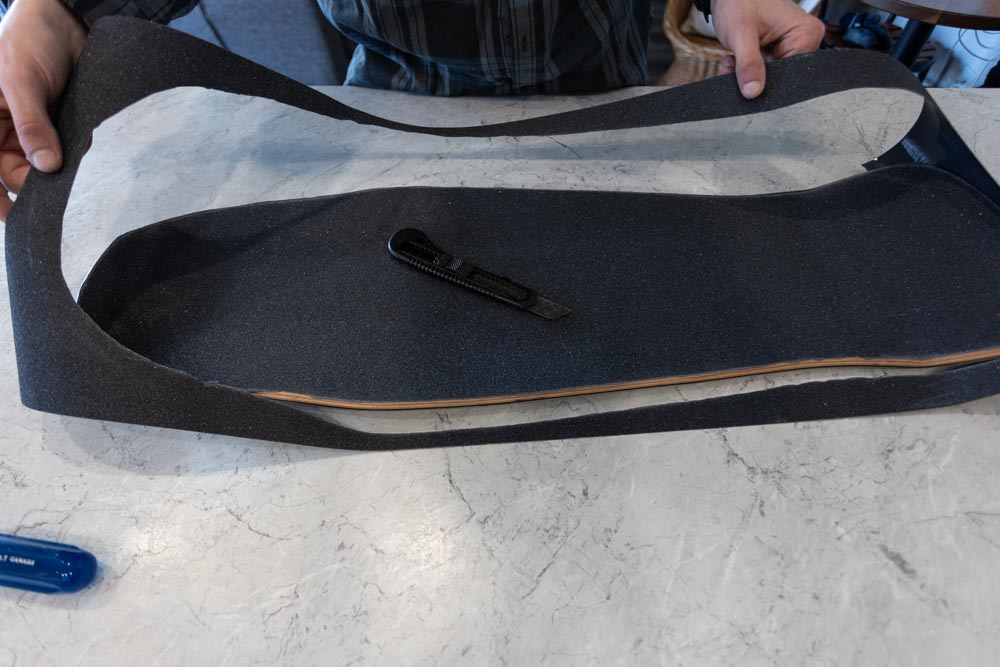
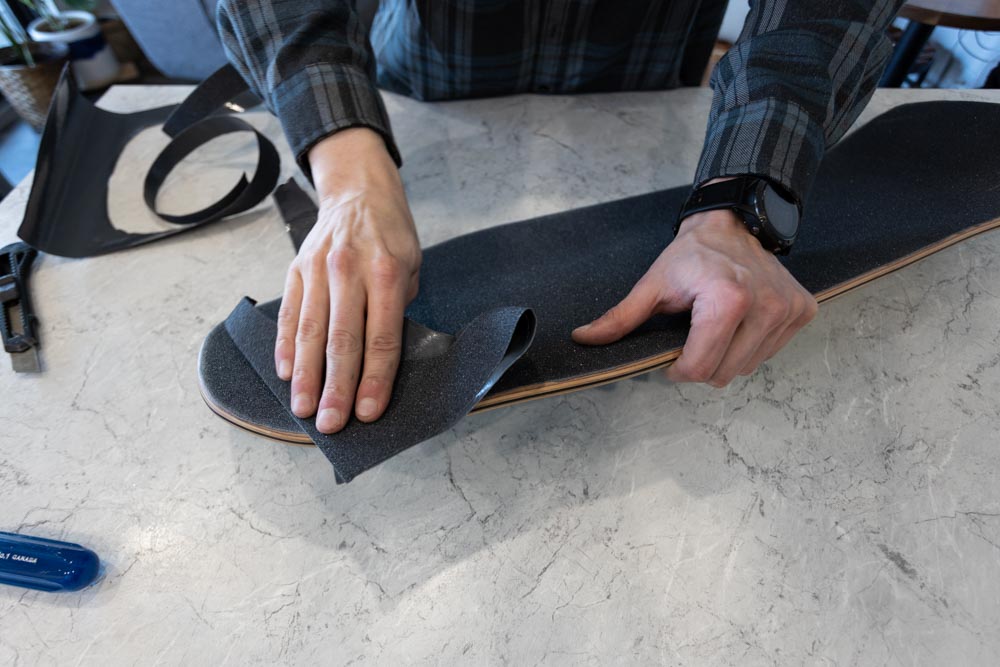
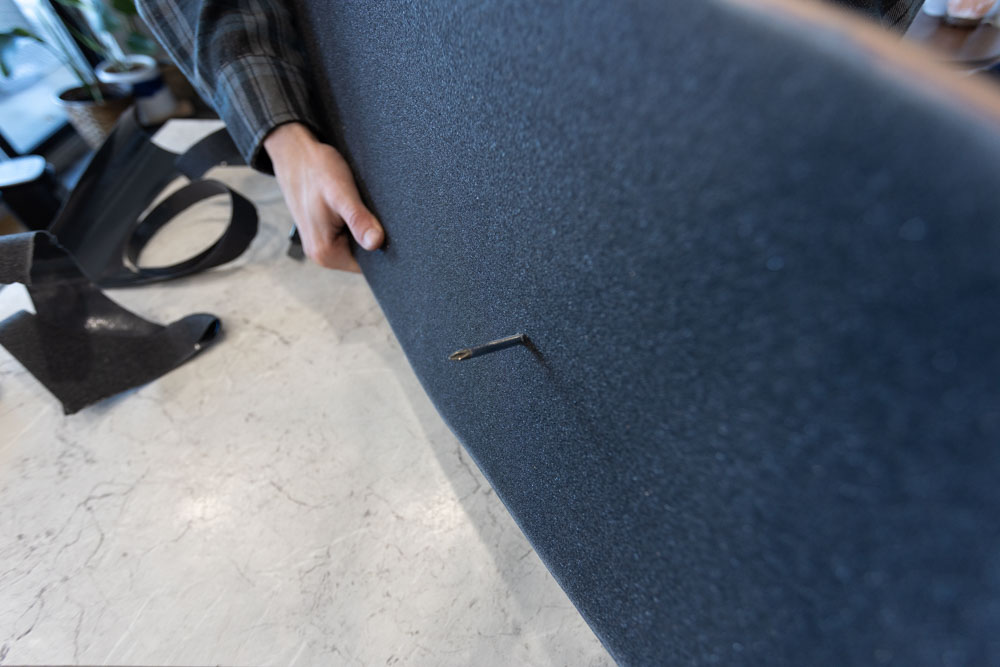
Step 7: Use The Excess Grip To Sand The Edges Of Your Deck
To help ensure your grip tape doesn’t start to peel, take a piece of the excess grip you just trimmed and fold it in half.
Now rub this piece of grip tape along all the edges of your deck to finalize your gripping.
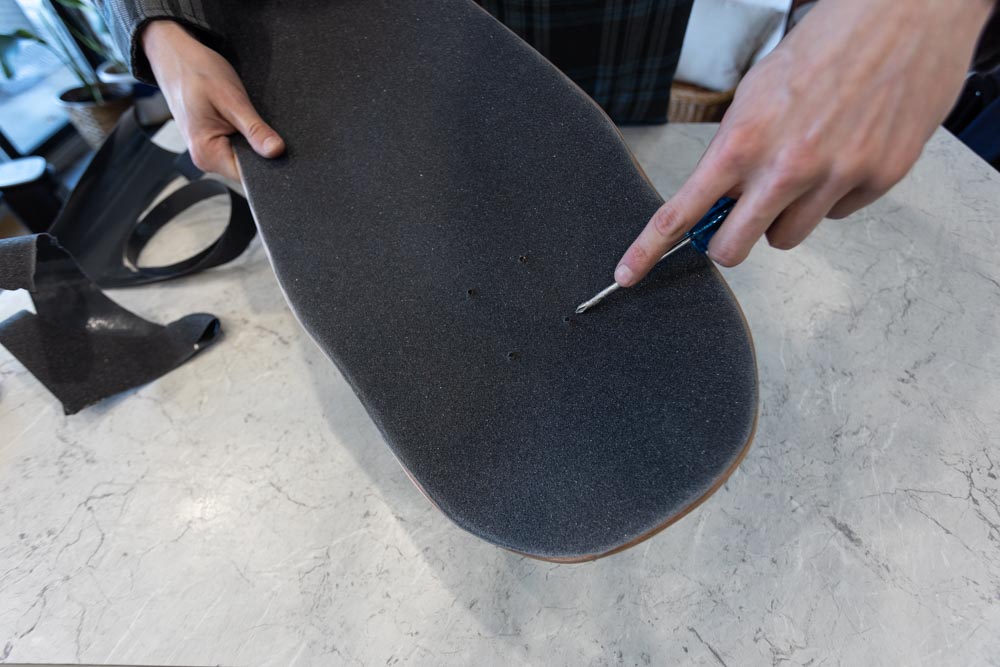
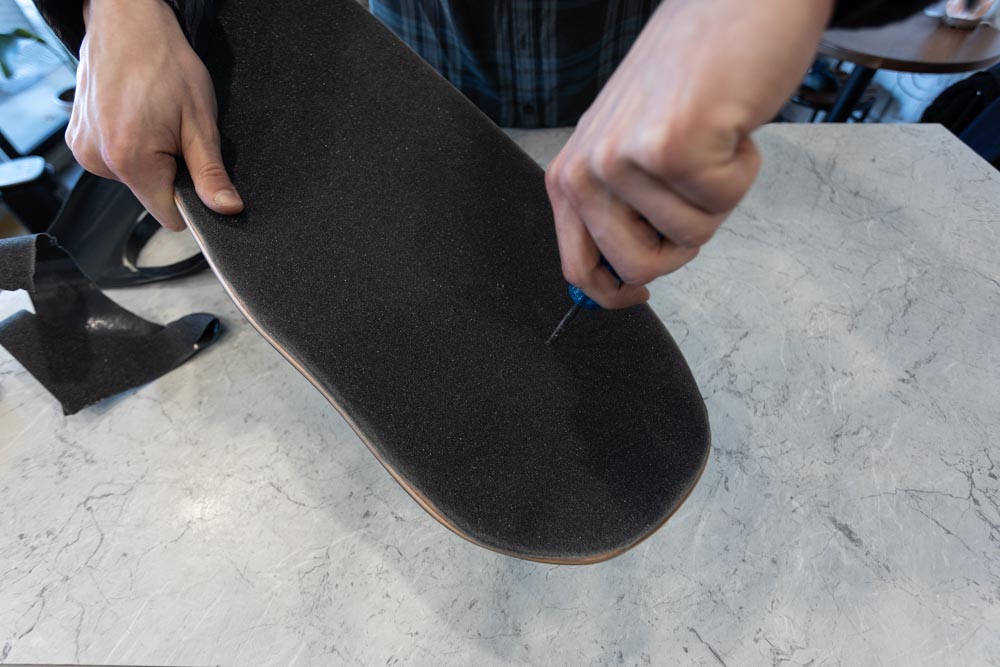
Step 8: Poke Holes Through The Hardware Holes In The Deck
Now that your grip tape is applied, you need to poke some holes in the grip tape to mount your trucks. You can use anything sharp for this, but I’ll use the same Phillips screwdriver as I used to file the grip tape earlier. Starting from the graphics side of the deck, poke holes through to pierce the grip tape.
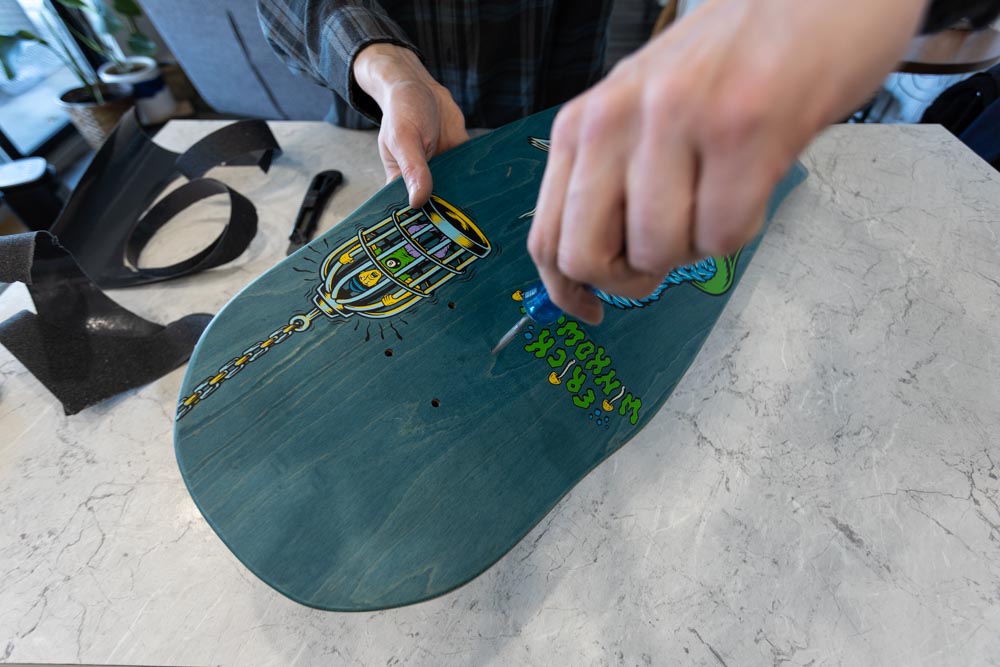
Repeat for all eight of the hardware holes in the deck.
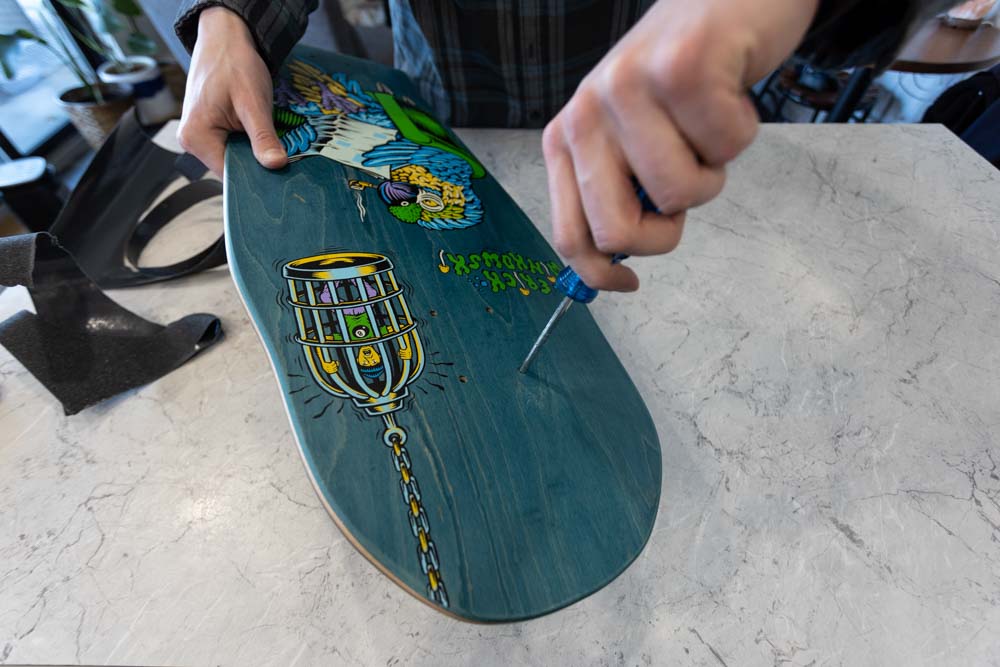
Once you’ve poked a hole from the bottom, poke through from the top side of the deck too to help make room for the bolts to push through easily.
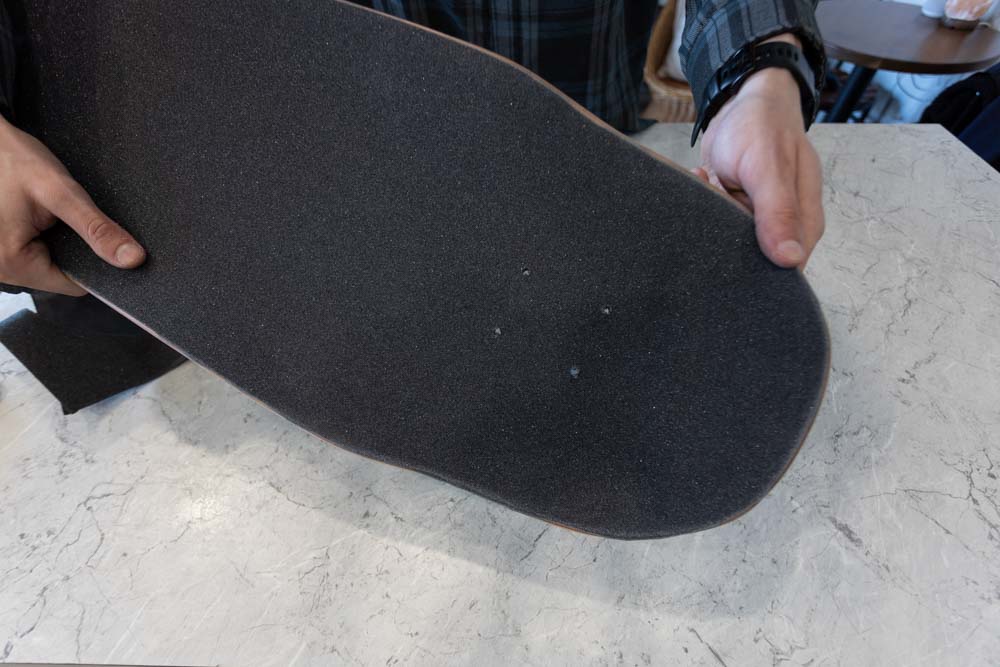
When you’re done, your deck will look something like this, ready for your trucks to be mounted!
Some people will try to push their hardware through to make these holes, but with blunt objects, you run the risk of tearing your grip tape around the bolt holes. Using something pointy will give you a cleaner result when poking the hardware holes!
Step 9: Mount Your Trucks & Wheels
So your grip tape job is done. Now it’s time to push your hardware through the deck and mount your trucks and wheels. Using your hardware kit and a skate tool (or 3/8 socket), tighten on all the nuts and bolts to secure your trucks.

Step 10: Go Skate!
With everything mounted, get out there is start shredding on your new grip tape!
How To Put Designs In Your Grip Tape
The easiest way to put designs in your grip tape is before you ever peel off the backing. With the help of a hand-drawn outline or a stencil on parchment paper, simply place it over the backing and use a sharp blade to cut out the design.
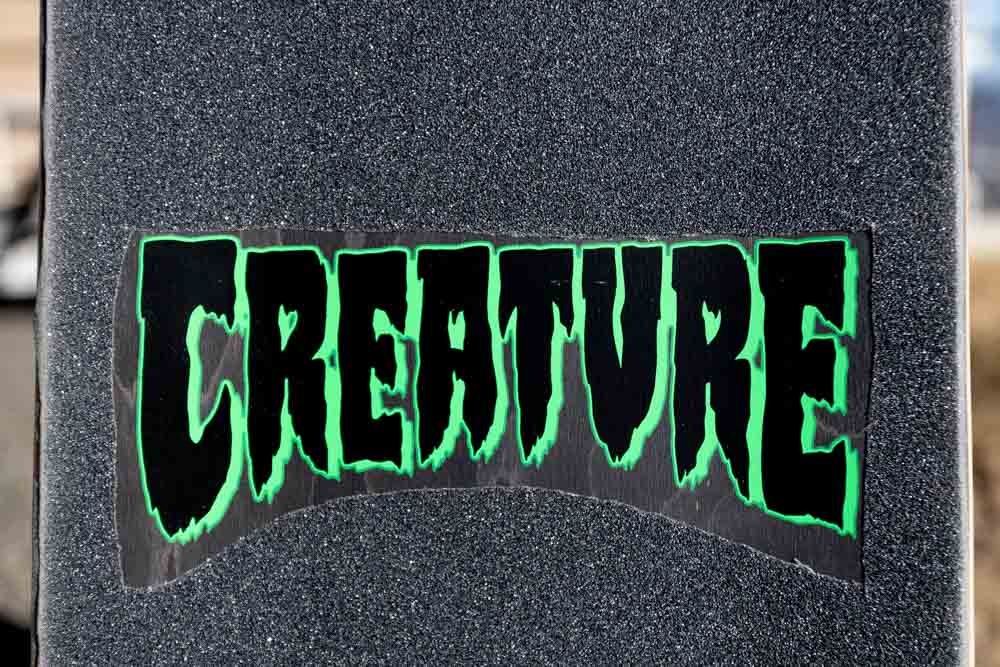
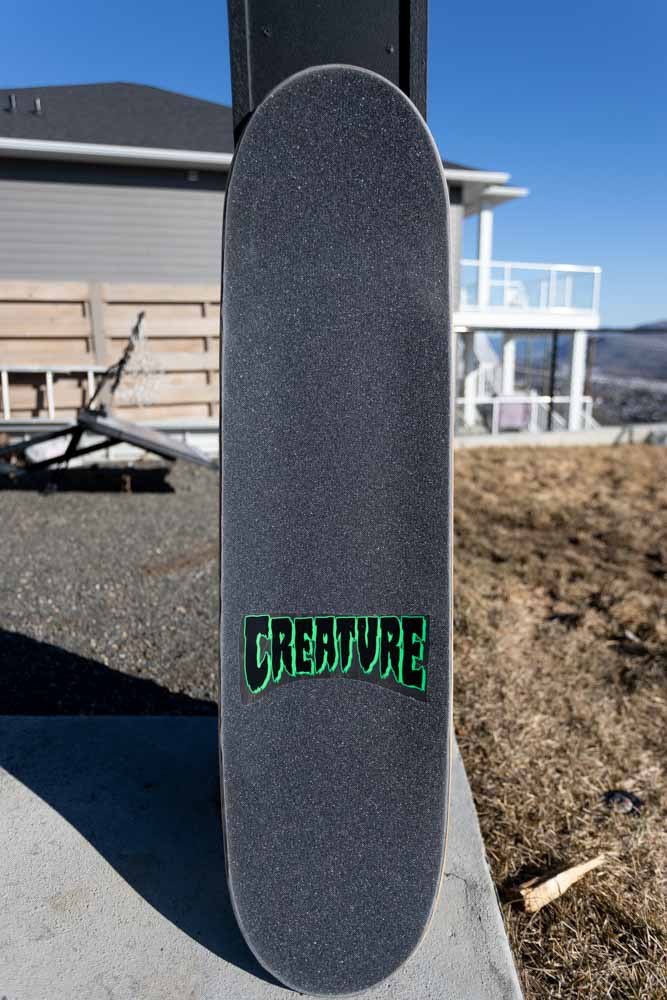
Here’s an example of creating a stencil around the Creature logo on the top of my deck.
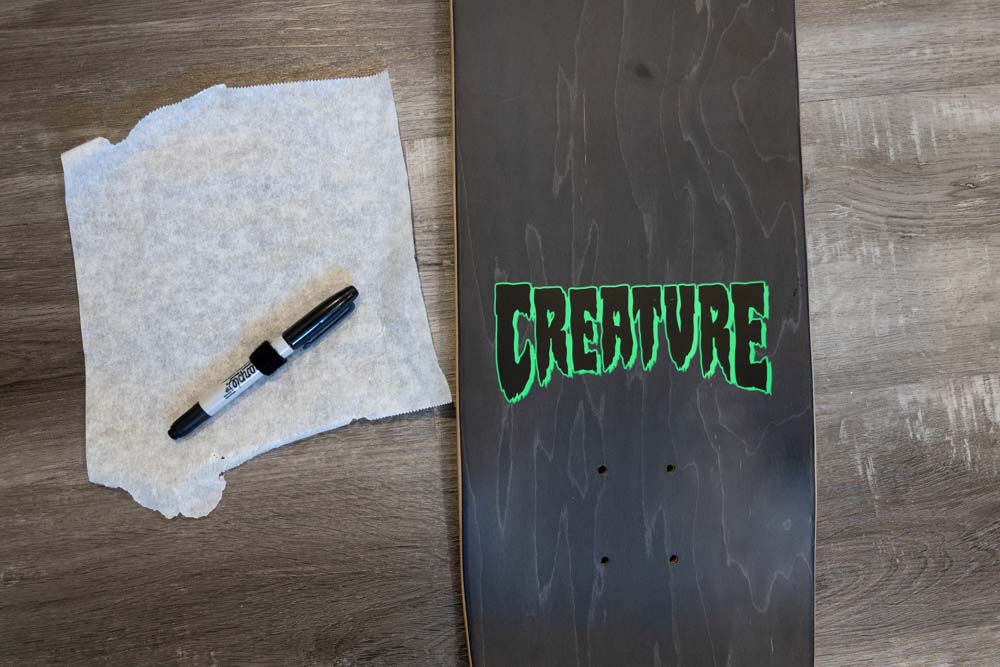
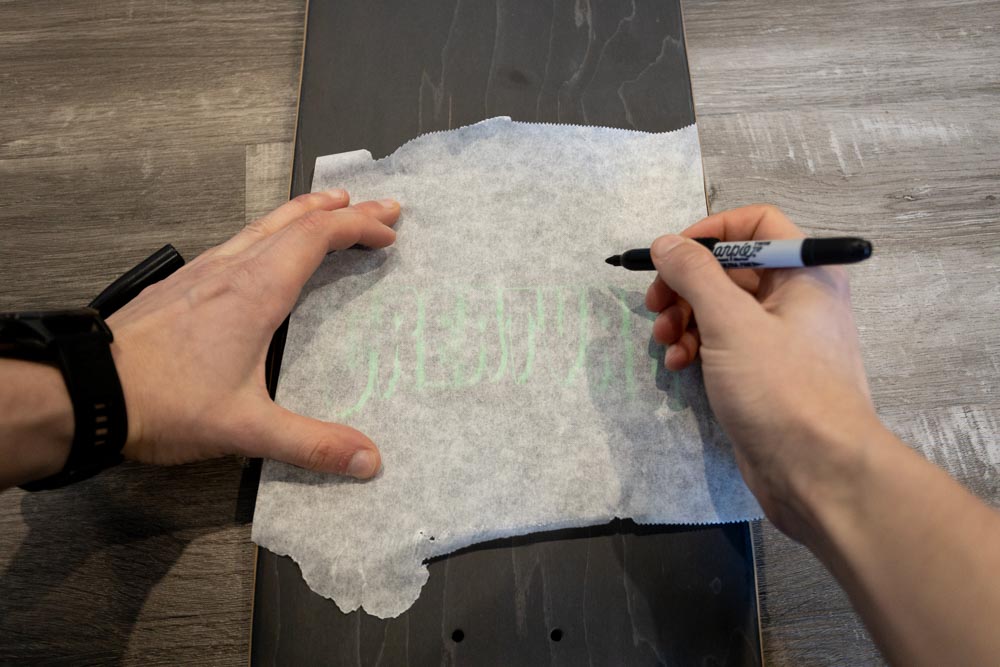
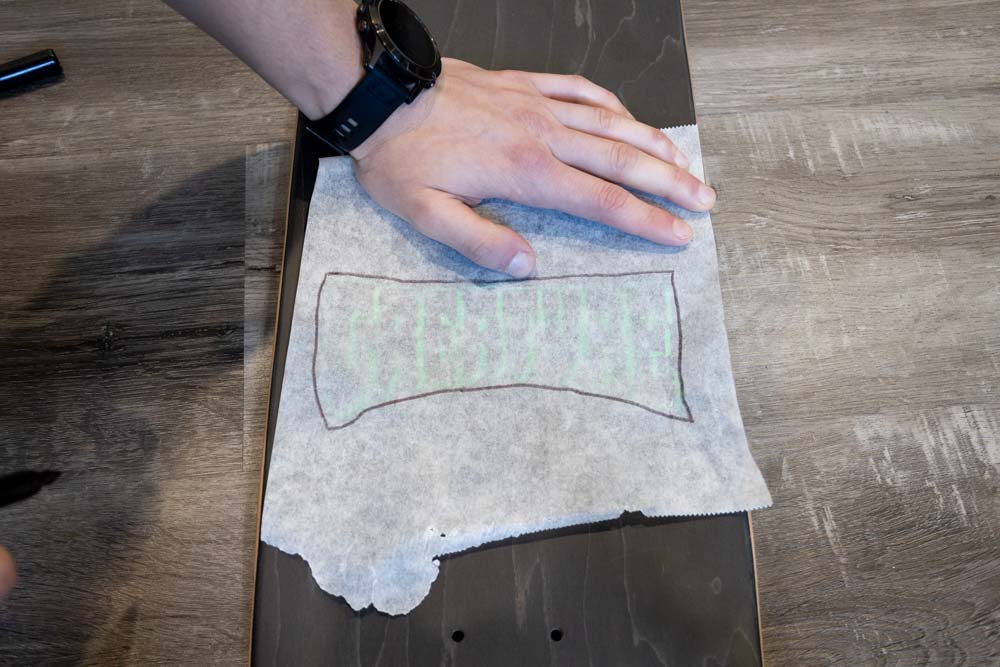
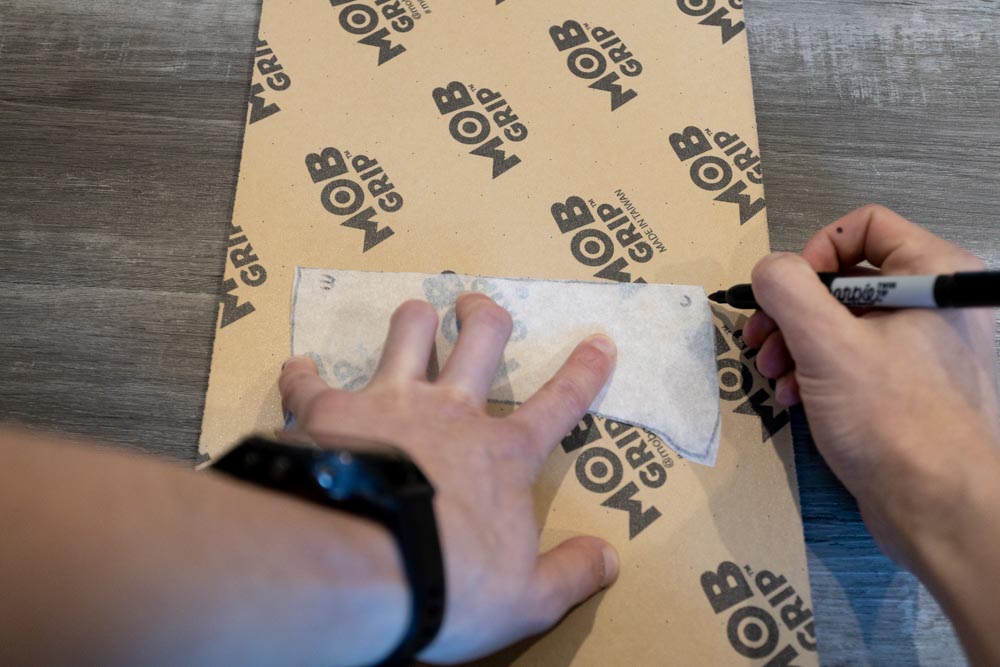
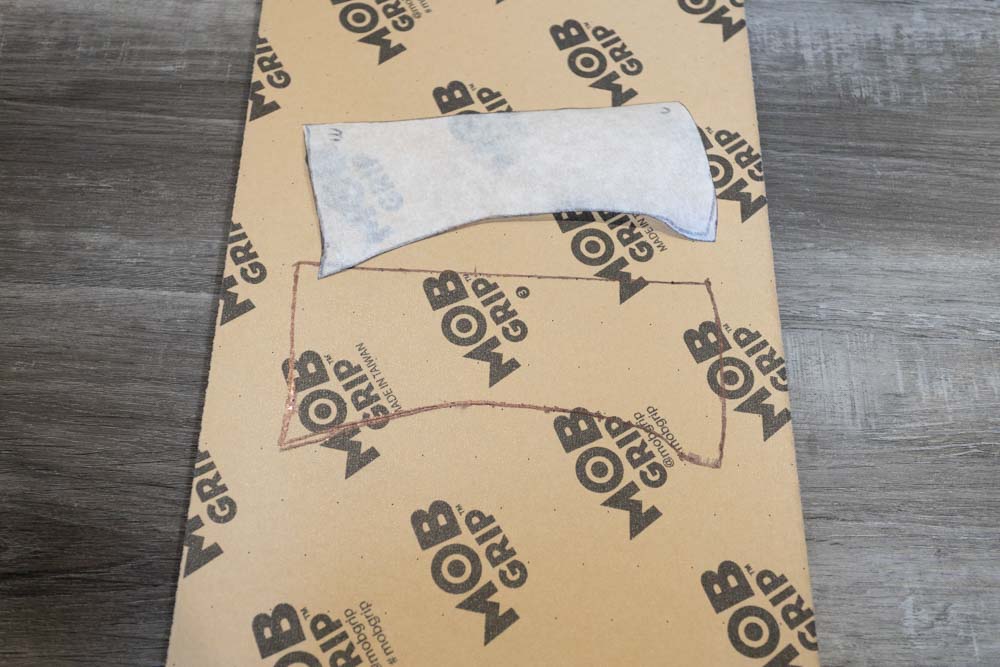
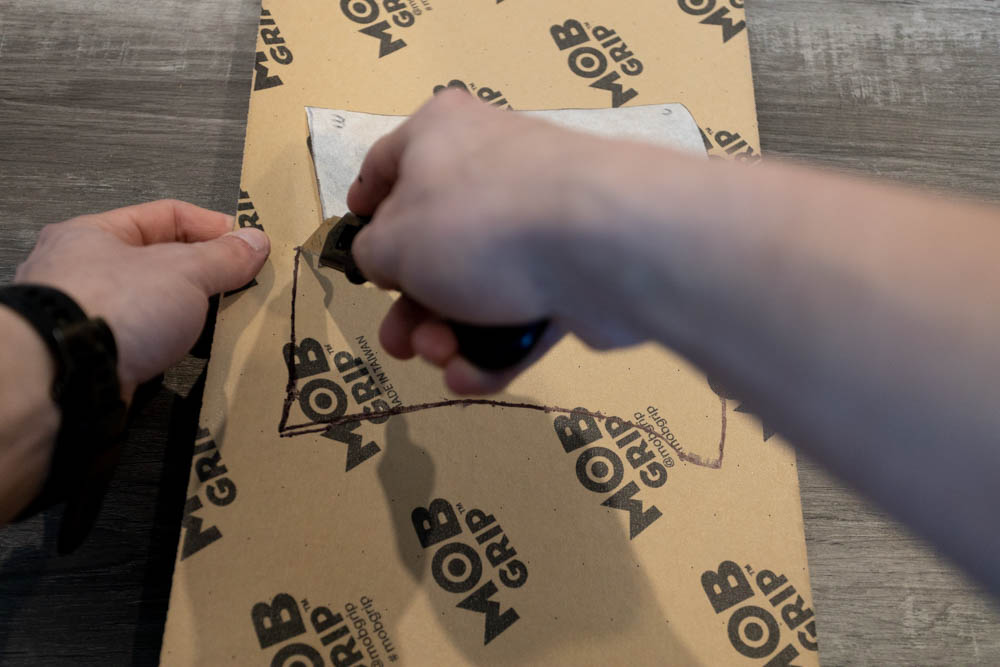
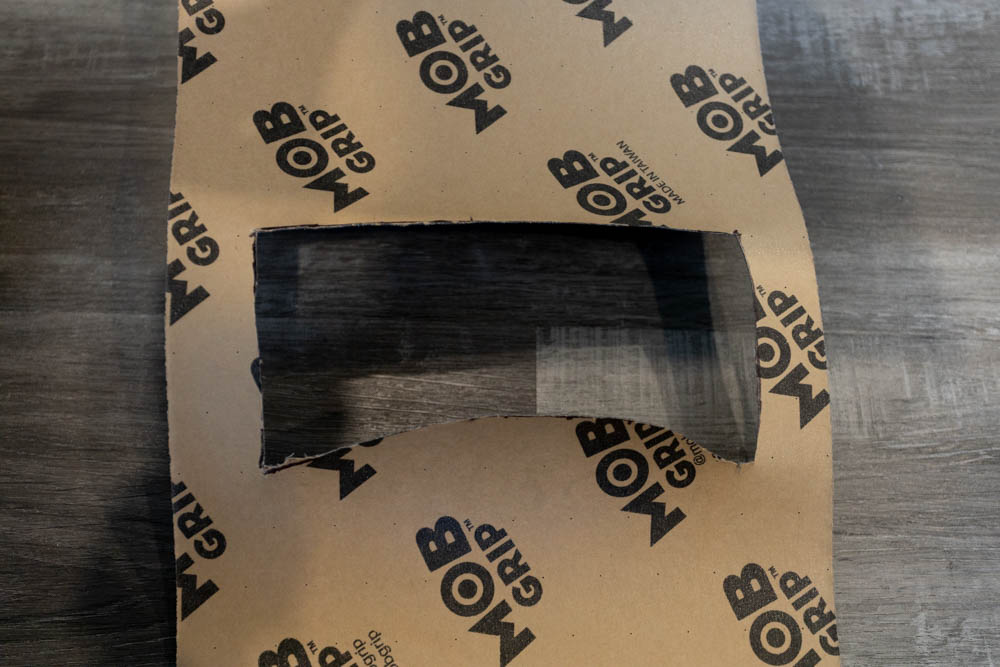
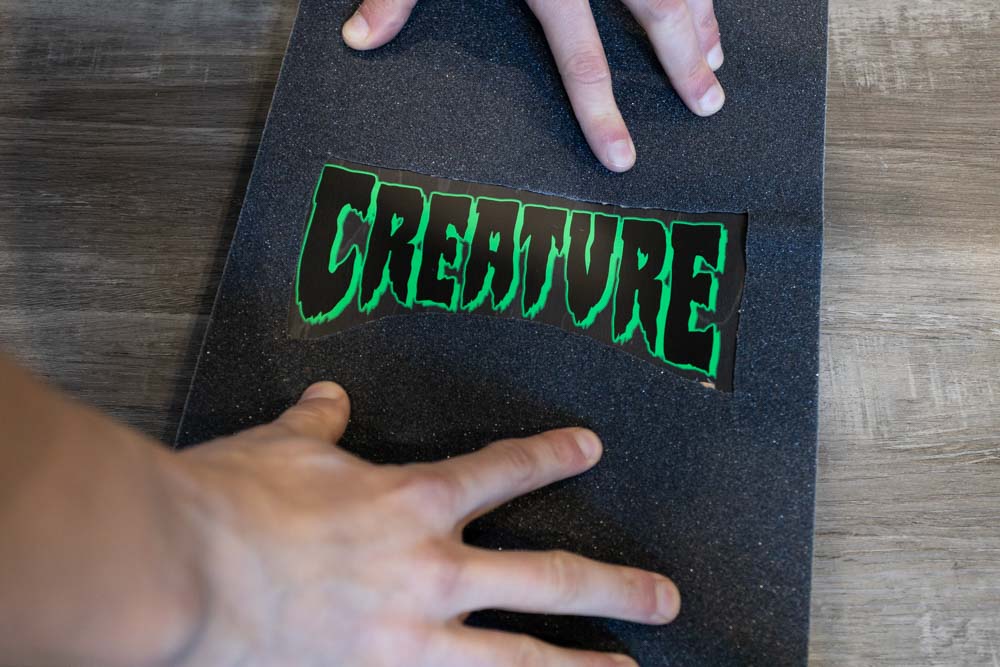
Just remember that the design will be mirrored when you flip around the grip tape, so you’ll need to outline it in the opposite orientation that you want it to appear on your deck. Once the stencil is cut out, apply the grip tape the same as you would normally, except while taking extra care to align the cutout.
For more simple deck designs such as straight lines near the tail or down the center of the deck, you can use the precut edges of the grip tape sheet. For example, if you wanted a thin straight line down the center of your deck, peel off the grip tape backing halfway across the width of the sheet, then apply that half of the grip tape so it ends in the middle of the deck.
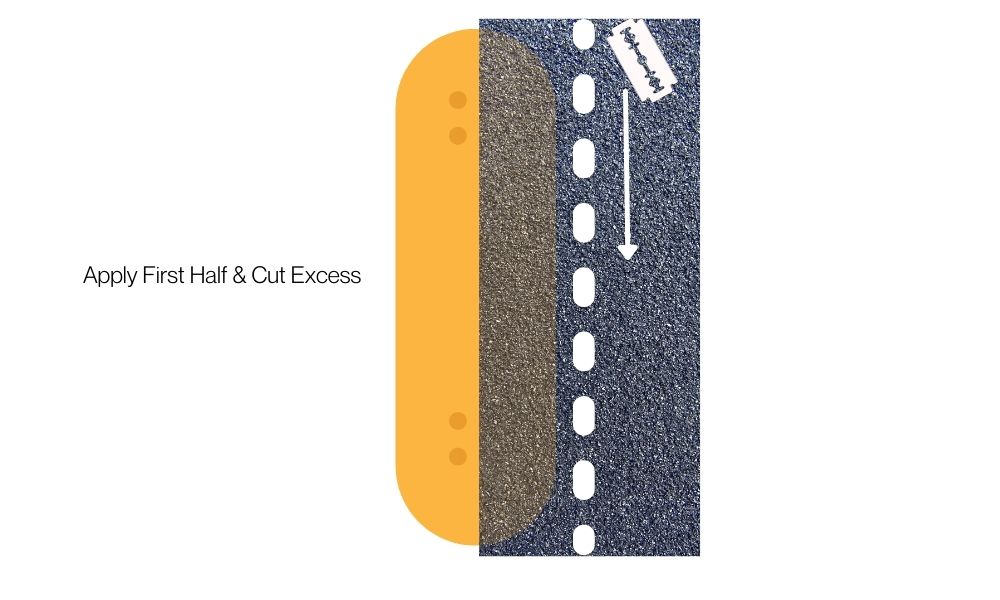
After that first half is applied, cut off the remaining half with your knife and place it on the other side of the deck, aligning the edges to be parallel with the grip tape that’s already applied.
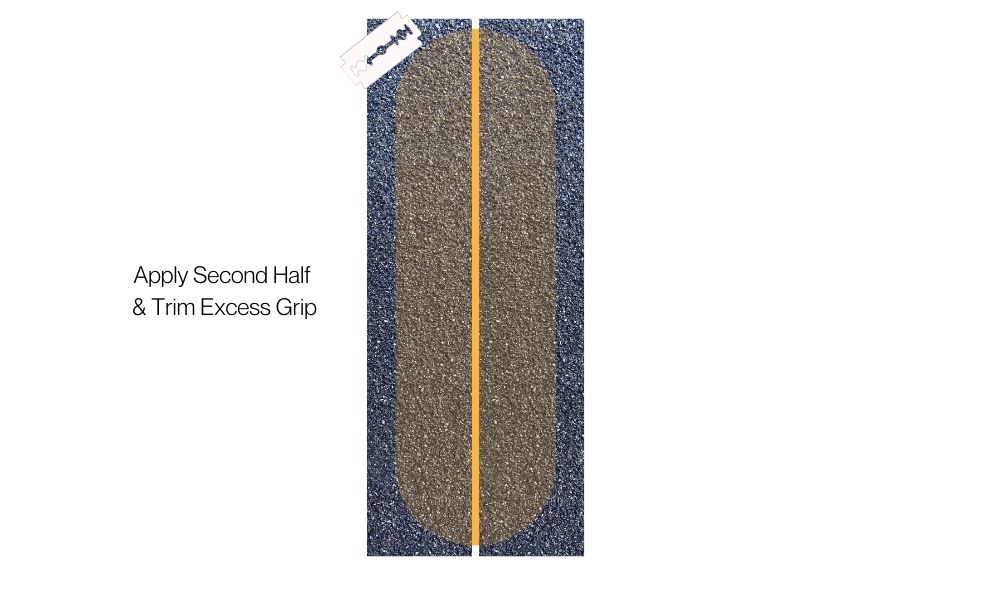
Using the precut edges of your grip tape is a super-easy way to make perfectly straight cuts in your grip tape designs since it’s already done for you!
How To Remove Grip Tape From An Old Skateboard Deck
Now if you have an old deck that you’re turning into a cruiser, are wanting to hang your deck on the wall, or have just trashed your grip tape from dark slides, removing and replacing the grip tape is a good idea. With the help of a hairdryer, you can peel off an old sheet of grip tape pretty quickly.
To start, you’ll need the following items:
- A hairdryer or heat gun
- A sharp blade
- Some patience
First, take your hairdryer to the hottest setting and heat up the grip tape along one end of your skateboard. After about 30 seconds the grip tape will warm up enough that the adhesive will loosen.
Once the grip tape is warm to the touch, take your blade and peel up the grip tape along the edges of where you heated until there is enough to hold onto.
With this small flap peeled up, use your hairdryer to heat up the rest of the grip tape until it is warm to the touch. From there, carefully peel back the rest of your grip tape using the small flap you lifted with your blade. To make life easy, standing on your deck as you peel gives better leverage while peeling.
Depending on the type of grip tape you’re using, it may rip as you go. That’s where a bit of patience comes in handy as you’ll simply need to reheat the ripped area, and continue peeling until all of the grip tape is lifted.
Once all the grip tape is removed (along with any small remnants), you can either reapply a new sheet of grip tape or use goo-gone to remove the remaining adhesive if you plan to hang your deck on the wall.
Can You Put Grip Tape Over Grip Tape?
Unfortunately, you cannot put new grip tape over existing grip tape since the adhesive of the new grip tape will not stick well to the old grip tape. This will make the new grip peel off quickly and become useless.
If you are wanting to put a new sheet of grip on your board, removing the old grip tape with a hairdryer is your only option.
Can You Cut Grip Tape With Scissors?
If you have a very sharp pair of scissors, it is possible to cut your grip tape with them. However, when trimming excess grip tape off your deck, using a blade is much easier for cutting smooth edges around the grip tape.
The only time I would opt for scissors over a blade is when I am cutting a larger design in the grip tape. Although I would start the cut with a blade, cutting out the remainder of the design may be easier with scissors depending on how many intricate details there are.
How Do You Apply Grip Tape Without A Razor?
In some situations, you’ll be setting up a new deck while you’re out skating and you don’t have a blade on hand. In that case, you can take your truck and grind it against the edge of the board once the grip tape is applied. With enough pressure and rubbing, it will wear right through the grip tape and technically trim the grip without using a razor.
Just don’t be surprised when your grip tape job looks a bit rough compared to when you cut it with a blade.
Do You Have To Put Grip Tape On A Skateboard?

Grip tape is one of the most essential parts of your skateboard setup as it provides traction for maneuvering your skateboard and doing tricks. Without grip tape, your feet would slide on the wooden deck making for an unsafe and far more difficult skate session.
With complete skateboards from a local skate shop, grip tape will already be applied to the board making life easy. However, if you’re building a skateboard from scratch and the thought of gripping your skateboard seems overwhelming, you can always ask the shop to grip it for you.
Just remember that skate shops won’t usually do any cool grip tape designs, so if that’s something you want to do, you’ll need to grip the board yourself.
Learning how to apply grip tape on a skateboard is a valuable skill for all skaters to have, plus it’s actually pretty satisfying. Regardless of the brand of grip tape you use, the application process will remain the exact same. Since grip tape lasts for a very long time, your skateboard deck will probably need replacing long before your grip tape does. For that reason, it’s easiest to think of grip tape as a “once in the lifetime of your deck” type of thing.
With all that said, you may be surprised to know there are quite a few differences between brands of grip tape. Some are far more coarse than others which will shred up your shoes but stick to your feet like glue. Other grip tapes are cheaper but tend to crack and peel far easier than the more expensive grips.
So to help you find the best grip tape for your next skateboard setup, check out this guide I wrote sharing the 10 best grip tapes I’ve used after 10+ years of skating.
Happy Shredding!
Brendan 🙂


